Lantern (Piece of Eden): Difference between revisions
imported>Gener4l Cl4ank4 Created page with "{{Era|Technology|Isu}} {{Spoilerhd|8 July 2025|Assassin's Creed: Forgotten Temple}} {{Conjecture}} {{Quote|This little trinket has the power to heal the mind from the effects of the other Isu artifact... More specifically all the psychic damage. I think it was originally intended to be used as a pair with the first artifact.|Noa Kim on the Piece of Eden's powers, 1725.|Assassin's Creed: Forgotten Temple|Assassin's Creed: Forgotten Temple Episode 101}} {{Item Infobox..." |
imported>Soranin mNo edit summary |
||
| (12 intermediate revisions by 3 users not shown) | |||
| Line 1: | Line 1: | ||
{{Era|Technology|Isu}} | {{Era|Technology|Isu}} | ||
{{Conjecture}} | {{Conjecture}} | ||
{{Quote|This little trinket has the power to heal the mind from the effects of the other Isu artifact... More specifically all the psychic damage. I think it was originally intended to be used as a pair with the first artifact.|Noa Kim on the Piece of Eden's powers, | {{Quote|This little trinket has the power to heal the mind from the effects of the other Isu artifact... More specifically all the psychic damage. I think it was originally intended to be used as a pair with the first artifact.|Noa Kim on the Piece of Eden's powers, c. 2023.|Assassin's Creed: Forgotten Temple|Assassin's Creed: Forgotten Temple Episode 101}} | ||
{{Item Infobox | {{Item Infobox | ||
|name = Lantern | |name = Lantern | ||
| Line 13: | Line 12: | ||
*Access to the [[Synch Nexus]] | *Access to the [[Synch Nexus]] | ||
*Healing psychic damage | *Healing psychic damage | ||
*Advanced knowledge | |||
'''Combined with the amulet:''' | '''Combined with the amulet:''' | ||
*Witnessing any past, present, and possible future event | *Witnessing any past, present, and possible future event | ||
|current = With [[ | |current = With [[Noa Kim]] | ||
|period = *Prehistory | |period = *Prehistory | ||
*[[Golden Age of Piracy]] | *[[Golden Age of Piracy]] | ||
| Line 22: | Line 22: | ||
|made = Prehistory | |made = Prehistory | ||
|notable = *[[Edward Kenway]] | |notable = *[[Edward Kenway]] | ||
*[[John Young]] | |||
*[[Noa Kim]] | *[[Noa Kim]] | ||
}} | }} | ||
The '''lantern''' is a [[Piece of Eden]] created by the [[Isu]] alongside two other artifacts: the [[crescent amulet]] and the [[lotus disk]]. It was designed to balance out the amulet's abilities, reversing all psychic damage | The '''lantern''' is a [[Piece of Eden]] created by the [[Isu]] alongside two other artifacts: the [[crescent amulet]] and the [[lotus disk]]. It was designed to balance out the amulet's abilities, reversing all forms of psychic damage while also having several unique powers of its own. | ||
For centuries, the lantern was housed in the [[Shwedagon Pagoda]], a sacred [[Buddhism|Buddhist]] temple in [[Myanmar]]. In 1725, it was retrieved by the [[British Brotherhood of Assassins|British Assassin]] [[Edward Kenway]] | For centuries, the lantern was housed in the [[Shwedagon Pagoda]], a sacred [[Buddhism|Buddhist]] [[temple]] in [[Myanmar]]. In 1725, it was retrieved by the [[British Brotherhood of Assassins|British Assassin]] [[Edward Kenway]], allowing him to recover from mental corruption brought on by the amulet. However, the artifact was later stolen by [[John Young]], a [[Templars|Templar]] spy working for the [[East India Company]], which sought the lantern and its [[Southeast Asian Pieces of Eden|sister Pieces of Eden]] for its own ends. | ||
Edward and his organization, the [[Zhawang Corporation|Zhang Wei Union]], eventually succeeded in recovering the artifact, which was returned to the Shwedagon Pagoda. In 2023, it would be removed from the temple once again, this time by Edward's descendant [[Noa Kim]], who was suffering from the amulet's corruption and the [[Bleeding Effect]]. After healing his psychic damage, Noa kept the Piece of Eden to prevent it from falling into the hands of [[Abstergo Industries]], who sought to use the lantern and its sister artifacts to bring about their vision of a [[New World Order]]. | |||
==Owners== | ==Owners== | ||
*[[Isu]] (until 75,000 BCE)<ref name="Initiates">''[[Assassin's Creed: Initiates]]'' – Timeline</ref> | *[[Isu]] (until 75,000 BCE)<ref name="Initiates">''[[Assassin's Creed: Initiates]]'' – Timeline</ref> | ||
*[[ | *[[Monk]]s from the [[Shwedagon Pagoda]] (until 1725) | ||
*[[Edward Kenway]] (1725) | *[[Edward Kenway]] (1725) | ||
*[[Yun Pyeong-Gyu]] (1725) | |||
*[[John Young]] (1725) | |||
*[[East India Company]] (1725) | |||
*[[Noa Kim]] (2023) | *[[Noa Kim]] (2023) | ||
*[[Shimazu Sei]] (2023) | *[[Shimazu Sei]] (2023) | ||
*Noa Kim (2023) | |||
==Functionality== | ==Functionality== | ||
{{Quote|The second artifact is used to control the powers of the first.|Edward Kenway describing the lantern's purpose, 1725.|Assassin's Creed: Forgotten Temple|Assassin's Creed: Forgotten Temple Episode 96}} | {{Quote|The second artifact is used to control the powers of the first.|Edward Kenway describing the lantern's purpose, 1725.|Assassin's Creed: Forgotten Temple|Assassin's Creed: Forgotten Temple Episode 96}} | ||
The lantern was created in response to the corrupting effects of the crescent amulet. As such, its abilities balanced out the amulet's own powers. Its main purpose was to reverse all the | The lantern was created in response to the corrupting effects of the crescent amulet. As such, its abilities balanced out the amulet's own powers. Its main purpose was to reverse all the damage done to an individual's mind, [[human]] or [[Isu]], essentially "freeing" them from the amulet's control. This also allowed individuals suffering from severe cases of the [[Bleeding Effect]] to regain their sense of self.<ref name="EP 101">''[[Assassin's Creed: Forgotten Temple]]'' – [[Assassin's Creed: Forgotten Temple Episode 101|Episode 101]]</ref> | ||
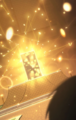
Unlike its sister Pieces of Eden, the lantern appeared to be sentient to a degree, as it would only allow itself to be claimed by those it deemed worthy of its power. To this end, it would "test" anyone who came in close proximity with it by subjecting them to hallucinations based on their deepest fears and desires, meant to break their will. Once an individual proved themselves worthy of claiming the artifact by passing | [[File:ACFT - Connor illusion.png|thumb|180px|left|The lantern projecting an apparition of [[Ratonhnhaké:ton]] to "speak" with Noa Kim]] | ||
Unlike its sister Pieces of Eden, the lantern appeared to be sentient to a degree, as it would only allow itself to be claimed by those it deemed worthy of its power. To this end, it would "test" anyone who came in close proximity with it by subjecting them to hallucinations based on their deepest fears and desires, meant to break their will. Once an individual proved themselves worthy of claiming the artifact by passing its trials, all the illusions conjured by the Piece of Eden would vanish.<ref name="EP 100">''[[Assassin's Creed: Forgotten Temple]]'' – [[Assassin's Creed: Forgotten Temple Episode 100|Episode 100]]</ref> | |||
The artifact could also create a [[Synch Nexus]] between individuals existing at different points in time, as it transported [[Edward Kenway]]'s consciousness to the future, enabling him to speak with his descendant, [[Noa Kim]].<ref name="EP 100" /> | The artifact could also create a [[Synch Nexus]] between individuals existing at different points in time, as it transported [[Edward Kenway]]'s consciousness to the future, enabling him to speak with his descendant, [[Noa Kim]].<ref name="EP 100" /> Like the [[Apples of Eden]], it possessed advanced knowledge and could answer virtually any question it was asked. When touched, it would project symbols and images into the air while emanating a blinding light.<ref name="EP 105">''[[Assassin's Creed: Forgotten Temple]]'' – [[Assassin's Creed: Forgotten Temple Episode 105|Episode 105]]</ref> | ||
When the lantern was used alongside the crescent amulet, the power of the two Pieces of Eden allowed the wielder to witness events from the past, present, and even [[Calculations|possible futures]].<ref name="EP 102>''[[Assassin's Creed: Forgotten Temple]]'' – Episode 102</ref> If the two artifacts were further combined with the lotus disk, the third Piece of Eden could spread their power across large distances.<ref name="EP 96">''[[Assassin's Creed: Forgotten Temple]]'' – [[Assassin's Creed: Forgotten Temple Episode 96|Episode 96]]</ref> | When the lantern was used alongside the crescent amulet, the power of the two Pieces of Eden allowed the wielder to witness events from the past, present, and even [[Calculations|possible futures]].<ref name="EP 102>''[[Assassin's Creed: Forgotten Temple]]'' – [[Assassin's Creed: Forgotten Temple Episode 102|Episode 102]]</ref> If the two artifacts were further combined with the lotus disk, the third Piece of Eden could spread their power across large distances.<ref name="EP 96">''[[Assassin's Creed: Forgotten Temple]]'' – [[Assassin's Creed: Forgotten Temple Episode 96|Episode 96]]</ref> | ||
==History== | ==History== | ||
| Line 52: | Line 60: | ||
====The Zhang Wei Union's heist==== | ====The Zhang Wei Union's heist==== | ||
{{Quote|Should the artifact fall into the hands of a being with impure motives, we believe it will cause much suffering among humankind. That is why we have decided it would be best given to you instead.|A Buddhist monk to Shimazu Saito, 1725.|Assassin's Creed: Forgotten Temple|Assassin's Creed: Forgotten Temple Episode 97}} | {{Quote|Should the artifact fall into the hands of a being with impure motives, we believe it will cause much suffering among humankind. That is why we have decided it would be best given to you instead.|A Buddhist monk to Shimazu Saito, 1725.|Assassin's Creed: Forgotten Temple|Assassin's Creed: Forgotten Temple Episode 97}} | ||
By the early 18th century, the lantern was housed within a special compartment inside the [[Shwedagon Pagoda]] in [[Yangon]], [[Myanmar|Burma]]. The temple's [[Buddhism|Buddhist]] [[Scholar|monks]] were fully aware of the artifact's existence and capabilities, and as such sought to prevent it from falling into the wrong hands, fearing that if a being with impure motives were to make use of it, it could potentially doom [[human]]kind.<ref name="EP 97">''[[Assassin's Creed: Forgotten Temple]]'' – Episode 97</ref> | By the early 18th century, the lantern was housed within a special compartment inside the [[Shwedagon Pagoda]] in [[Yangon]], [[Myanmar|Burma]]. The temple's [[Buddhism|Buddhist]] [[Scholar|monks]] were fully aware of the artifact's existence and capabilities, and as such sought to prevent it from falling into the wrong hands, fearing that if a being with impure motives were to make use of it, it could potentially doom [[human]]kind.<ref name="EP 97">''[[Assassin's Creed: Forgotten Temple]]'' – [[Assassin's Creed: Forgotten Temple Episode 97|Episode 97]]</ref> | ||
In 1725, the [[British Brotherhood of Assassins|British Assassin]] [[Edward Kenway]] discovered the lantern's whereabouts after coming into contact with the crescent amulet, which made him experience [[Calculations|visions]] of the past and the future.<ref name="EP 92">''[[Assassin's Creed: Forgotten Temple]]'' – [[Assassin's Creed: Forgotten Temple Episode 92|Episode 92]]</ref> Edward and his fellow [[Zhawang Corporation|Zhang Wei Union]] members subsequently sailed to Yangon, where they established contact with the monks. Believing the artifact would be safer in | [[File:ACFT - Shwedagon Pagoda interior.png|thumb|150px|Edward and Saito finding the lantern inside the Shwedagon Pagoda]] | ||
In 1725, the [[British Brotherhood of Assassins|British Assassin]] [[Edward Kenway]] discovered the lantern's whereabouts after coming into contact with the crescent amulet, which made him experience [[Calculations|visions]] of the past and the future.<ref name="EP 92">''[[Assassin's Creed: Forgotten Temple]]'' – [[Assassin's Creed: Forgotten Temple Episode 92|Episode 92]]</ref> Edward and his fellow [[Zhawang Corporation|Zhang Wei Union]] members subsequently sailed to Yangon, where they established contact with the monks. Believing the artifact would be safer in their hands, the monks helped Edward, [[Shimazu Saito]], [[John Young]], and [[Yun Pyeong-Gyu]] infiltrate the city in disguise, whereupon they were left to find a way into the heavily-guarded Shwedagon Pagoda.<ref name="EP 97" /> | |||
At night, using the [[Celestial Chariot]], a prototype | At night, using the [[Celestial Chariot]], a prototype [[hot air balloon]] built by Yun, Edward and Saito flew over Yangon and [[parachute]]d onto the pagoda.<ref name="EP 97" /> They then entered the temple through a hole in the roof and found the lantern.<ref name="EP 98">''[[Assassin's Creed: Forgotten Temple]]'' – [[Assassin's Creed: Forgotten Temple Episode 98|Episode 98]]</ref> As Edward touched the artifact, it briefly transported his mind centuries into the future, allowing the Assassin to speak with his descendant, [[Noa Kim]].<ref name="EP 100" /> | ||
After Edward assured Noa that he would keep fighting for the future,<ref name="EP 100" /> he retrieved the Piece of Eden before he and Saito left the Shwedagon Pagoda through a secret tunnel.<ref name="EP 101" /> The pair then escaped | After Edward assured Noa that he would keep fighting for the future,<ref name="EP 100" /> he retrieved the Piece of Eden before he and Saito left the Shwedagon Pagoda through a secret tunnel.<ref name="EP 101" /> The pair then escaped Yangon with help from the Buddhist monks, just as the [[Soldier|guards]] became aware of the lantern's theft and began searching for the culprits. Edward thanked the monks for their aid and promised to return the lantern to the pagoda once he was done using it.<ref name="EP 102" /> | ||
====Stolen by the Templars==== | |||
{{Quote|They promisd me, all I have to do is hand the artifact over to them. And with the power of the artifact... they'll bring my precious Xialun back to life.|John Young to Edward Kenway, 1725.|Assassin's Creed: Forgotten Temple|Assassin's Creed: Forgotten Temple Episode 106}} | |||
After escaping from Yangon and regrouping with Yun and John, Edward and Saito attempted to return to their flagship, the ''[[Fenghuang]]''. While sailing along the [[Yangon River]], Edward allowed Yun to activate the lantern, which displayed holographic images and symbols. The Assassin immediately deactivated the artifact before Yun grabbed it and retreated to his cabin, asking not to be disturbed while he researched the artifact. However, not long after, John snuck up on Yun and knocked him out, before taking the scientist hostage and placing the Piece of Eden in a bag.<ref name="EP 105" /> | |||
[[File:ACFT - John stealing the artifact.png|thumb|200px|left|John stealing the lantern]] | |||
As the group's ship and the ''Fenghuang'' came under attack by the [[East India Company]], John confronted Edward and Saito, revealing himself to be a [[Templars|Templar]] spy and that the Order had promised him a way to resurrect his late fiancée, [[Xialun Qing]], using the Pieces of Eden's powers. Furious at John's betrayal, Saito tried to attack him, but at that moment the ship was sunk by a [[cannon]]ball, leaving Edward, Saito, and Yun stranded in the water while John was picked up by Company soldiers in a rowboat.<ref name="EP 106">''[[Assassin's Creed: Forgotten Temple]]'' – [[Assassin's Creed: Forgotten Temple Episode 106|Episode 106]]</ref> | |||
After [[Nagamasa]] and his [[Mercenary|mercenaries]] saved Edward, Saito, and Yun, as well as the rest of the ''Fenghuang''{{'}}s crew, the group chased John's ship in an attempt to recover the stolen Piece of Eden.<ref name="EP 107">''[[Assassin's Creed: Forgotten Temple]]'' – [[Assassin's Creed: Forgotten Temple Episode 107|Episode 107]]</ref> They [[Battle of the Strait of Malacca|ambushed]] the enemy vessel in the [[Strait of Malacca]], allowing Saito and several crew members to board it, whereupon the [[samurai]] attacked John. However, the Templar threatened to drop the bag containing the artifact overboard, leaving him and Saito at an impasse.<ref name="EP 108">''[[Assassin's Creed: Forgotten Temple]]'' – [[Assassin's Creed: Forgotten Temple Episode 108|Episode 108]]</ref> | |||
Once an East India Company fleet commanded by the Templar [[Grand Master of the Templar Order|Grand Master]] [[Alan Jacob]] arrived and attacked the ''Fenghuang'', the Zhang Wei Union members decided to retreat. In the confusion, John dropped the bag he was holding and Saito caught it, only to discover that it was empty and that John had the lantern on his person. The Templar then kicked Saito overboard and ultimately retained possession of the artifact,<ref name="EP 109">''[[Assassin's Creed: Forgotten Temple]]'' – [[Assassin's Creed: Forgotten Temple Episode 109|Episode 109]]</ref> delivering it to the Company.<ref name="EP 110">''[[Assassin's Creed: Forgotten Temple]]'' – [[Assassin's Creed: Forgotten Temple Episode 110|Episode 110]]</ref> | |||
===Modern times=== | ===Modern times=== | ||
====Recovery by Noa Kim==== | ====Recovery by Noa Kim==== | ||
{{Quote|But if you're asking me what I'm going to do with the artifact's power... then I choose freedom above all else! The freedom to walk down whatever path I think is right!|Noa answering the lantern's question, | {{Quote|But if you're asking me what I'm going to do with the artifact's power... then I choose freedom above all else! The freedom to walk down whatever path I think is right!|Noa answering the lantern's question, 2023.|Assassin's Creed: Forgotten Temple|Assassin's Creed: Forgotten Temple Episode 100}} | ||
In 2023, Noa Kim, [[Shimazu Sei]], [[Yuki]], and [[Nathan Zhang]] discovered the | The Zhang Wei Union eventually succeeded in recovering the lantern and returned it to the Shwedagon Pagoda, where it would remain for the next three centuries. In 2023, Noa Kim, [[Shimazu Sei]], [[Yuki]], and [[Nathan Zhang]] discovered the artifact's location through the [[Genetic memory|genetic memories]] of Edward Kenway relived by Noa.<ref name="EP 92" /> After traveling to Yangon, the group devised a plan to infiltrate the temple and retrieve the Piece of Eden so they could use it to cure Noa, who was suffering from the [[Bleeding Effect]] and believed himself to be Edward.<ref name="EP 98" /> | ||
While Nathan and his [[Doom Eagle]] engaged in a shootout with the soldiers guarding the pagoda as a distraction, Noa and Sei infiltrated one of the nearby temples. There, they found a secret underground passage leading to the central pagoda and used it to reach their destination.<ref name="EP 98" /> As soon as they approached the Piece of Eden, however, they were | [[File:ACFT - Noa taking the artifact.png|thumb|190px|Noa taking the lantern]] | ||
While Nathan and his [[Doom Eagle]] thugs engaged in a shootout with the soldiers guarding the pagoda as a distraction, Noa and Sei infiltrated one of the nearby temples. There, they found a secret underground passage leading to the central pagoda and used it to reach their destination.<ref name="EP 98" /> As soon as they approached the Piece of Eden, however, they were both forced to overcome a series of trials created by the artifact in order to claim it.<ref name="EP 99">''[[Assassin's Creed: Forgotten Temple]]'' – [[Assassin's Creed: Forgotten Temple Episode 99|Episode 99]]</ref> | |||
Sei was confronted by an apparition of [[Mitsuko Nakamura]], who taunted her about her work at [[Abstergo Industries]] over the years, during which Sei had indirectly killed numerous test subjects through the [[Animus Project]]. She was also confronted by apparitions of Yuki and a [[Shimazu clan]] member, representing the guilt Sei felt for turning her back on her family and losing her purpose. With the help of | Sei was confronted by an apparition of [[Mitsuko Nakamura]], who taunted her about her work at [[Abstergo Industries]] over the years, during which Sei had indirectly killed numerous test subjects through the [[Animus Project]]. She was also confronted by apparitions of Yuki and a [[Shimazu clan]] member, representing the guilt Sei felt for turning her back on her family and losing her purpose. With the help of a vision of Saito, who encouraged her to forge her own path, Sei overcame these emotions, but the guilt she felt for the Animus Project's casualties proved too strong and she was rendered unconscious.<ref name="EP 99" /> | ||
Meanwhile, Noa came face-to-face with an apparition of [[Bartholomew Roberts]] and then Edward himself, whom he was forced to fight. Realizing that he could not defeat Edward and that this was not the purpose of the trial, he surrendered, prompting the Piece of Eden to initiate its next "test". Projecting an apparition of Noa's [[Noa Kim's father|father]], the artifact offered to help Noa solve the mystery of his roots, but he refused and declared that he would follow his own path instead of looking into the past for answers. Satisfied with the response, the lantern's illusions vanished and Noa was allowed to claim the artifact. In the process, he also got the chance to meet and speak with Edward through a [[Synch Nexus]] created by the Piece of Eden.<ref name="EP 100" /> | Meanwhile, Noa came face-to-face with an apparition of [[Bartholomew Roberts]] and then Edward himself, whom he was forced to fight. Realizing that he could not defeat Edward and that this was not the purpose of the trial, he surrendered, prompting the Piece of Eden to initiate its next "test". Projecting an apparition of Noa's [[Noa Kim's father|father]], the artifact offered to help Noa solve the mystery of his roots, but he refused and declared that he would follow his own path instead of looking into the past for answers. Satisfied with the response, the lantern's illusions vanished and Noa was allowed to claim the artifact. In the process, he also got the chance to meet and speak with Edward through a [[Synch Nexus]] created by the Piece of Eden.<ref name="EP 100" /> | ||
==== | ====Carried by Shimazu Sei==== | ||
{{Dialogue|Noa|The worst-case scenario here is if they manage to round us all up and take the artifact from me. That's why we need to keep hold of at least one of the artifacts, just so they don't get their hands on both. With that in mind, I'm going to leave the second artifact with you, Sei.|Sei|Understood. I'll do whatever I can to help until we've found all the artifacts.|Noa entrusting the lantern to Sei, | {{Dialogue|Noa|The worst-case scenario here is if they manage to round us all up and take the artifact from me. That's why we need to keep hold of at least one of the artifacts, just so they don't get their hands on both. With that in mind, I'm going to leave the second artifact with you, Sei.|Sei|Understood. I'll do whatever I can to help until we've found all the artifacts.|Noa entrusting the lantern to Sei, 2023.|Assassin's Creed: Forgotten Temple|Assassin's Creed: Forgotten Temple Episode 102}} | ||
After retrieving the lantern, which cured him of his Bleeding Effect, Noa and Sei escaped through the same hidden tunnel used by their ancestors and regrouped with Yuki and Nathan, who had barely managed to flee [[Sigma Team]]'s attack on the Shwedagon Pagoda.<ref name="EP 101" /> With both the lantern and the crescent amulet in his possession, Noa used the two Pieces of Eden to look into the past and witness Edward's own escape from the pagoda.<ref name="EP 102" /> | [[File:ACFT - Noa combining the artifacts.png|thumb|200px|left|Noa holding the lantern and the crescent amulet]] | ||
After retrieving the lantern, which cured him of his Bleeding Effect, Noa and Sei escaped through the same hidden tunnel used by their ancestors and regrouped with Yuki and Nathan, who had barely managed to flee [[Sigma Team]]'s attack on the Shwedagon Pagoda.<ref name="EP 101" /> With both the lantern and the crescent amulet in his possession, Noa used the two Pieces of Eden to look into the past and witness Edward's own escape from the pagoda in 1725.<ref name="EP 102" /> | |||
After the group reached their [[Myanmar safehouse|hideout]] outside the city, they discussed their next course of action. As Yuki and Nathan had different ideas of what to do with the Pieces of Eden in their possession, they argued until Noa stopped them. Declaring that he would only use the artifacts if absolutely necessary, Noa decided to keep the amulet while entrusting the lantern, which had been placed in a briefcase, to Sei. The [[doctor]] swore to protect it, and the group left their hideout, heading to Yangon's harbor to flee the country and escape from the Abstergo forces hunting them.<ref name="EP 102" /> | |||
However, during their infiltration of the harbor, the group was discovered and attacked by Sigma Team.<ref name="EP 103">''[[Assassin's Creed: Forgotten Temple]]'' – [[Assassin's Creed: Forgotten Temple Episode 103|Episode 103]]</ref> Although Yuki sacrificed herself to buy the others time to reach a nearby hangar, the Abstergo operatives cornered Noa, Sei, and Nathan inside, preventing them from escaping.<ref name="EP 104">''[[Assassin's Creed: Forgotten Temple]]'' – [[Assassin's Creed: Forgotten Temple Episode 104|Episode 104]]</ref> Out of options, Sei seized the amulet from Noa and used it to subdue Sigma Team long enough for Noa and Nathan to board a {{Wiki|seaplane}} and fly away from Yangon with the lantern.<ref name="EP 105" /> | |||
====Safeguarded by Noa==== | |||
{{Quote|I used the artifact's power on her for now... but she went further into the Animus than I've ever been. The only thing that can save her now is her own will to keep fighting.|Noa, after using the lantern to cure Sei's Bleeding Effect, 2023.|Assassin's Creed: Forgotten Temple|Assassin's Creed: Forgotten Temple Episode 114}} | |||
Noa kept the artifact as he and Nathan sought refuge on an [[uncharted island]], where they hid from Abstergo while Noa relived Edward's memories in the [[Animus|Animus HR-8]] to track down the lotus disk, the third and final Piece of Eden.<ref name="EP 105" /> After escaping an attack by Sigma Team with the help of [[DedSec]] and a group of Assassins sent by Nathan's sister [[Claire Zhang]], they traveled to the [[Zhawang Corporation]]'s headquarters in [[Jakarta]], where an alliance between the Corporation, the Assassins, and DedSec was formed to fight against Abstergo.<ref name="EP 112">''[[Assassin's Creed: Forgotten Temple]]'' – [[Assassin's Creed: Forgotten Temple Episode 112|Episode 112]]</ref> | |||
Learning that the Templars had used Sei's genetic memories to find and retrieve the lotus disk, the group decided to assassinate Sei and prevent Abstergo from extracting more information from her. Noa volunteered to carry out the mission and infiltrated the [[Abstergo Genetic Research Lab]] in [[Osaka]], [[Japan]], where he decided to save Sei instead.<ref name="EP 113">''[[Assassin's Creed: Forgotten Temple]]'' – [[Assassin's Creed: Forgotten Temple Episode 113|Episode 113]]</ref> Since the doctor was suffering from a severe Bleeding Effect, Noa used the lantern to try and heal her, but Sei's mind was too damaged and she slipped into a coma-like state.<ref name="EP 114">''[[Assassin's Creed: Forgotten Temple]]'' – [[Assassin's Creed: Forgotten Temple Episode 114|Episode 114]]</ref> | |||
While waiting for Sei to awaken, Noa continued to relive Edward's memories in the [[Brahman 3.0]], an Animus model developed by the Zhawang Corporation. Having learned that Abstergo sought the "[[Forgotten Temple (Isu)|Forgotten Temple]]", an Isu [[Temple (Isu)|vault]] where the full potential of the three Pieces of Eden could be unlocked, Noa and his allies resolved to find the temple first and foil the Templars' plans.<ref name="EP 114" /> | |||
==Gallery== | ==Gallery== | ||
<gallery position="center" widths="180" captionalign="center"> | <gallery position="center" widths="180" captionalign="center"> | ||
ACFT - Pieces of Eden transmitting a signal.png|The lantern combined with the other two Pieces of Eden | ACFT - Pieces of Eden transmitting a signal.png|The lantern combined with the other two Pieces of Eden | ||
ACFT - Artifact healing psychic damage.png|The lantern countering the crescent amulet's effects | |||
ACFT - Lantern and amulet.png|The lantern and the amulet combined | |||
ACFT - Artifact projections.png|The lantern projecting images into the air | |||
ACFT - Shwedagon artifact.png|The lantern within its special compartment inside the Shwedagon Pagoda | |||
ACFT - Sei reaching for the artifact.png|Shimazu Sei reaching for the lantern | |||
ACFT - Noa and Edward looking at the artifact.png|Edward Kenway and Noa Kim looking at the lantern | |||
</gallery> | </gallery> | ||
| Line 86: | Line 124: | ||
==References== | ==References== | ||
{{Reflist}} | {{Scroll box|content={{Reflist}}}} | ||
{{Isu}} | {{Isu}} | ||
{{ACFT}} | {{ACFT}} | ||
[[Category:Pieces of Eden]] | [[Category:Pieces of Eden]] | ||
[[Category:Buddhism]] | |||
Latest revision as of 15:16, 11 October 2025

|
I wanted to ask you something. Which is... what's your name? This article title is conjecture. Although the article subject is canon, no official name for it has been given. |
The lantern is a Piece of Eden created by the Isu alongside two other artifacts: the crescent amulet and the lotus disk. It was designed to balance out the amulet's abilities, reversing all forms of psychic damage while also having several unique powers of its own.
For centuries, the lantern was housed in the Shwedagon Pagoda, a sacred Buddhist temple in Myanmar. In 1725, it was retrieved by the British Assassin Edward Kenway, allowing him to recover from mental corruption brought on by the amulet. However, the artifact was later stolen by John Young, a Templar spy working for the East India Company, which sought the lantern and its sister Pieces of Eden for its own ends.
Edward and his organization, the Zhang Wei Union, eventually succeeded in recovering the artifact, which was returned to the Shwedagon Pagoda. In 2023, it would be removed from the temple once again, this time by Edward's descendant Noa Kim, who was suffering from the amulet's corruption and the Bleeding Effect. After healing his psychic damage, Noa kept the Piece of Eden to prevent it from falling into the hands of Abstergo Industries, who sought to use the lantern and its sister artifacts to bring about their vision of a New World Order.
Owners[edit | edit source]
- Isu (until 75,000 BCE)[1]
- Monks from the Shwedagon Pagoda (until 1725)
- Edward Kenway (1725)
- Yun Pyeong-Gyu (1725)
- John Young (1725)
- East India Company (1725)
- Noa Kim (2023)
- Shimazu Sei (2023)
- Noa Kim (2023)
Functionality[edit | edit source]
The lantern was created in response to the corrupting effects of the crescent amulet. As such, its abilities balanced out the amulet's own powers. Its main purpose was to reverse all the damage done to an individual's mind, human or Isu, essentially "freeing" them from the amulet's control. This also allowed individuals suffering from severe cases of the Bleeding Effect to regain their sense of self.[2]

Unlike its sister Pieces of Eden, the lantern appeared to be sentient to a degree, as it would only allow itself to be claimed by those it deemed worthy of its power. To this end, it would "test" anyone who came in close proximity with it by subjecting them to hallucinations based on their deepest fears and desires, meant to break their will. Once an individual proved themselves worthy of claiming the artifact by passing its trials, all the illusions conjured by the Piece of Eden would vanish.[3]
The artifact could also create a Synch Nexus between individuals existing at different points in time, as it transported Edward Kenway's consciousness to the future, enabling him to speak with his descendant, Noa Kim.[3] Like the Apples of Eden, it possessed advanced knowledge and could answer virtually any question it was asked. When touched, it would project symbols and images into the air while emanating a blinding light.[4]
When the lantern was used alongside the crescent amulet, the power of the two Pieces of Eden allowed the wielder to witness events from the past, present, and even possible futures.[5] If the two artifacts were further combined with the lotus disk, the third Piece of Eden could spread their power across large distances.[6]
History[edit | edit source]
Early history[edit | edit source]
The lantern was created at some point during the Isu Era alongside its two sister Pieces of Eden, forming a set.[7] After the Great Catastrophe in 75,000 BCE, which wiped out the Isu civilization,[1] knowledge of the set, its location, and its powers was lost.[7]
18th century[edit | edit source]
The Zhang Wei Union's heist[edit | edit source]
By the early 18th century, the lantern was housed within a special compartment inside the Shwedagon Pagoda in Yangon, Burma. The temple's Buddhist monks were fully aware of the artifact's existence and capabilities, and as such sought to prevent it from falling into the wrong hands, fearing that if a being with impure motives were to make use of it, it could potentially doom humankind.[8]

In 1725, the British Assassin Edward Kenway discovered the lantern's whereabouts after coming into contact with the crescent amulet, which made him experience visions of the past and the future.[9] Edward and his fellow Zhang Wei Union members subsequently sailed to Yangon, where they established contact with the monks. Believing the artifact would be safer in their hands, the monks helped Edward, Shimazu Saito, John Young, and Yun Pyeong-Gyu infiltrate the city in disguise, whereupon they were left to find a way into the heavily-guarded Shwedagon Pagoda.[8]
At night, using the Celestial Chariot, a prototype hot air balloon built by Yun, Edward and Saito flew over Yangon and parachuted onto the pagoda.[8] They then entered the temple through a hole in the roof and found the lantern.[10] As Edward touched the artifact, it briefly transported his mind centuries into the future, allowing the Assassin to speak with his descendant, Noa Kim.[3]
After Edward assured Noa that he would keep fighting for the future,[3] he retrieved the Piece of Eden before he and Saito left the Shwedagon Pagoda through a secret tunnel.[2] The pair then escaped Yangon with help from the Buddhist monks, just as the guards became aware of the lantern's theft and began searching for the culprits. Edward thanked the monks for their aid and promised to return the lantern to the pagoda once he was done using it.[5]
Stolen by the Templars[edit | edit source]
After escaping from Yangon and regrouping with Yun and John, Edward and Saito attempted to return to their flagship, the Fenghuang. While sailing along the Yangon River, Edward allowed Yun to activate the lantern, which displayed holographic images and symbols. The Assassin immediately deactivated the artifact before Yun grabbed it and retreated to his cabin, asking not to be disturbed while he researched the artifact. However, not long after, John snuck up on Yun and knocked him out, before taking the scientist hostage and placing the Piece of Eden in a bag.[4]

As the group's ship and the Fenghuang came under attack by the East India Company, John confronted Edward and Saito, revealing himself to be a Templar spy and that the Order had promised him a way to resurrect his late fiancée, Xialun Qing, using the Pieces of Eden's powers. Furious at John's betrayal, Saito tried to attack him, but at that moment the ship was sunk by a cannonball, leaving Edward, Saito, and Yun stranded in the water while John was picked up by Company soldiers in a rowboat.[11]
After Nagamasa and his mercenaries saved Edward, Saito, and Yun, as well as the rest of the Fenghuang's crew, the group chased John's ship in an attempt to recover the stolen Piece of Eden.[12] They ambushed the enemy vessel in the Strait of Malacca, allowing Saito and several crew members to board it, whereupon the samurai attacked John. However, the Templar threatened to drop the bag containing the artifact overboard, leaving him and Saito at an impasse.[13]
Once an East India Company fleet commanded by the Templar Grand Master Alan Jacob arrived and attacked the Fenghuang, the Zhang Wei Union members decided to retreat. In the confusion, John dropped the bag he was holding and Saito caught it, only to discover that it was empty and that John had the lantern on his person. The Templar then kicked Saito overboard and ultimately retained possession of the artifact,[14] delivering it to the Company.[15]
Modern times[edit | edit source]
Recovery by Noa Kim[edit | edit source]
The Zhang Wei Union eventually succeeded in recovering the lantern and returned it to the Shwedagon Pagoda, where it would remain for the next three centuries. In 2023, Noa Kim, Shimazu Sei, Yuki, and Nathan Zhang discovered the artifact's location through the genetic memories of Edward Kenway relived by Noa.[9] After traveling to Yangon, the group devised a plan to infiltrate the temple and retrieve the Piece of Eden so they could use it to cure Noa, who was suffering from the Bleeding Effect and believed himself to be Edward.[10]

While Nathan and his Doom Eagle thugs engaged in a shootout with the soldiers guarding the pagoda as a distraction, Noa and Sei infiltrated one of the nearby temples. There, they found a secret underground passage leading to the central pagoda and used it to reach their destination.[10] As soon as they approached the Piece of Eden, however, they were both forced to overcome a series of trials created by the artifact in order to claim it.[16]
Sei was confronted by an apparition of Mitsuko Nakamura, who taunted her about her work at Abstergo Industries over the years, during which Sei had indirectly killed numerous test subjects through the Animus Project. She was also confronted by apparitions of Yuki and a Shimazu clan member, representing the guilt Sei felt for turning her back on her family and losing her purpose. With the help of a vision of Saito, who encouraged her to forge her own path, Sei overcame these emotions, but the guilt she felt for the Animus Project's casualties proved too strong and she was rendered unconscious.[16]
Meanwhile, Noa came face-to-face with an apparition of Bartholomew Roberts and then Edward himself, whom he was forced to fight. Realizing that he could not defeat Edward and that this was not the purpose of the trial, he surrendered, prompting the Piece of Eden to initiate its next "test". Projecting an apparition of Noa's father, the artifact offered to help Noa solve the mystery of his roots, but he refused and declared that he would follow his own path instead of looking into the past for answers. Satisfied with the response, the lantern's illusions vanished and Noa was allowed to claim the artifact. In the process, he also got the chance to meet and speak with Edward through a Synch Nexus created by the Piece of Eden.[3]
Carried by Shimazu Sei[edit | edit source]
- Noa: "The worst-case scenario here is if they manage to round us all up and take the artifact from me. That's why we need to keep hold of at least one of the artifacts, just so they don't get their hands on both. With that in mind, I'm going to leave the second artifact with you, Sei."
- Sei: "Understood. I'll do whatever I can to help until we've found all the artifacts."
- —Noa entrusting the lantern to Sei, 2023.[src]-[m]

After retrieving the lantern, which cured him of his Bleeding Effect, Noa and Sei escaped through the same hidden tunnel used by their ancestors and regrouped with Yuki and Nathan, who had barely managed to flee Sigma Team's attack on the Shwedagon Pagoda.[2] With both the lantern and the crescent amulet in his possession, Noa used the two Pieces of Eden to look into the past and witness Edward's own escape from the pagoda in 1725.[5]
After the group reached their hideout outside the city, they discussed their next course of action. As Yuki and Nathan had different ideas of what to do with the Pieces of Eden in their possession, they argued until Noa stopped them. Declaring that he would only use the artifacts if absolutely necessary, Noa decided to keep the amulet while entrusting the lantern, which had been placed in a briefcase, to Sei. The doctor swore to protect it, and the group left their hideout, heading to Yangon's harbor to flee the country and escape from the Abstergo forces hunting them.[5]
However, during their infiltration of the harbor, the group was discovered and attacked by Sigma Team.[17] Although Yuki sacrificed herself to buy the others time to reach a nearby hangar, the Abstergo operatives cornered Noa, Sei, and Nathan inside, preventing them from escaping.[18] Out of options, Sei seized the amulet from Noa and used it to subdue Sigma Team long enough for Noa and Nathan to board a seaplane and fly away from Yangon with the lantern.[4]
Safeguarded by Noa[edit | edit source]
Noa kept the artifact as he and Nathan sought refuge on an uncharted island, where they hid from Abstergo while Noa relived Edward's memories in the Animus HR-8 to track down the lotus disk, the third and final Piece of Eden.[4] After escaping an attack by Sigma Team with the help of DedSec and a group of Assassins sent by Nathan's sister Claire Zhang, they traveled to the Zhawang Corporation's headquarters in Jakarta, where an alliance between the Corporation, the Assassins, and DedSec was formed to fight against Abstergo.[19]
Learning that the Templars had used Sei's genetic memories to find and retrieve the lotus disk, the group decided to assassinate Sei and prevent Abstergo from extracting more information from her. Noa volunteered to carry out the mission and infiltrated the Abstergo Genetic Research Lab in Osaka, Japan, where he decided to save Sei instead.[20] Since the doctor was suffering from a severe Bleeding Effect, Noa used the lantern to try and heal her, but Sei's mind was too damaged and she slipped into a coma-like state.[21]
While waiting for Sei to awaken, Noa continued to relive Edward's memories in the Brahman 3.0, an Animus model developed by the Zhawang Corporation. Having learned that Abstergo sought the "Forgotten Temple", an Isu vault where the full potential of the three Pieces of Eden could be unlocked, Noa and his allies resolved to find the temple first and foil the Templars' plans.[21]
Gallery[edit | edit source]
-
 The lantern combined with the other two Pieces of Eden
 -
 The lantern countering the crescent amulet's effects
 -
 The lantern and the amulet combined
 -
 The lantern projecting images into the air
 -
 The lantern within its special compartment inside the Shwedagon Pagoda
 -
 Shimazu Sei reaching for the lantern
 -
 Edward Kenway and Noa Kim looking at the lantern


Appearances[edit | edit source]
References[edit | edit source]

| |||||||||||||||||||||||||||||||||||||