Rhona Dinsmore: Difference between revisions
imported>Maxattac Created page with "{{Era|AC4}} {{WP-REAL}} {{Spoilerhd}} {{Stub}} '''Rhona Dinsmore''' (c. 1695 – unknown) was the leader of the Assassins in Havana ==Reference== *''[[Assassin's Creed IV..." |
m Text replacement - " " to " " |
||
| (94 intermediate revisions by 38 users not shown) | |||
| Line 1: | Line 1: | ||
{{Era| | {{Era|Individuals|Assassins}} | ||
{{ | {{Quote|Ah... Captain Kenway. I'm assuming this is the friendliest face you've seen since dropping anchor?|Rhona to Edward Kenway, 1722.|Assassin's Creed IV: Black Flag|Tainted Blood}} | ||
{{ | {{Character Infobox | ||
| image = AC4 Rhona Dinsmore render.png | |||
'''Rhona Dinsmore''' ( | | birth = 1688<br>{{Wiki|Glasgow}}, [[Scotland|Kingdom of Scotland]] | ||
| death = | |||
| affiliates = [[Assassins]] | |||
*[[West Indies Brotherhood of Assassins|West Indies Brotherhood]] | |||
| voice = [[Lynsey-Anne Moffat]] | |||
| species = [[Human]] | |||
| database = [[Database: Rhona Dinsmore|Rhona Dinsmore]] | |||
}} | |||
'''Rhona Dinsmore''' (born 1688) was a [[Scotland|Scottish]] [[Master Assassin]] of the [[West Indies Brotherhood of Assassins|West Indies Brotherhood]] who led the [[Assassin bureau|bureau]] in [[Havana]] during the early-to-mid 18th century. | |||
== | ==Biography== | ||
*''[[Assassin's Creed IV: Black Flag]]'' | ===Early life=== | ||
Rhona was born in {{Wiki|Glasgow}} to an absent father and an alcoholic mother. Leaving her depressed household in her mid-teens, she found work among merchants in [[Bristol]] at the age of nineteen and remained at said post for almost two years.<ref name="Database">''[[Assassin's Creed IV: Black Flag]]'' – [[Database: Rhona Dinsmore]]</ref> | |||
By the age of twenty-one, Rhona became trapped in a distressing marriage. She fled once again, traveling to the New World and seeking refuge in [[Boston]], where she remained for six months, before moving to [[Jamaica]]. With work among farmers being exceedingly difficult to find, Rhona took to the sea and found her calling with the [[Assassins]]. Her dedication to the Order eventually led her to be promoted to the position of bureau leader.<ref name="Database"/> | |||
For several years, Rhona was in a conflicted relationship of undetermined nature with [[Hilary Flint]], an [[British Rite of the Templar Order|English Templar]]. During her time in the [[Caribbean|West Indies]], she also became loosely acquainted with the [[Piracy|pirate]] [[Edward Kenway]].<ref name="Bureau Under Attack">''Assassin's Creed IV: Black Flag'' – [[Bureau Under Attack]]</ref> | |||
===Conflict with Hilary Flint=== | |||
{{Dialogue|Edward|Possibly, I had a hand in selling a "sensitive document" to one of those Templar chaps you're so fond of.|Rhona|Congratulations. Your mission was a success.|Rhona chastising Edward for his actions, 1717.|Assassin's Creed IV: Black Flag|Bureau Under Attack}} | |||
In July 1715, the location of Rhona's bureau was unknowingly revealed to the [[Templars]] by Edward, who had delivered them maps—created by the traitorous Assassin [[Duncan Walpole]]—which detailed the whereabouts of various Assassin encampments in the Caribbean.<ref name="Mister Walpole">''Assassin's Creed IV: Black Flag'' – [[Mister Walpole, I Presume?]]</ref> Consequently, Rhona's bureau was repeatedly besieged by [[Spanish Army|Spanish troops]].<ref name="Bureau Under Attack"/> | |||
During one of these attacks in 1717, Rhona was joined by Edward, who had come to make amends on the suggestion of [[Mary Read|James Kidd]]. Together, the pair managed to withstand the onslaught of [[Soldier|guards]], following which Kenway requested Rhona's assistance in locating a [[Templar key]] required to access [[Assassin's Creed IV: Black Flag outfits#Templar armor|a set of robes]] at his base in [[Great Inagua]]. Rhona asked him how he would respond if she were to take the robes for herself, to which Kenway pointed out that they would not fit her.<ref name="Bureau Under Attack"/> | |||
Reluctantly, Rhona agreed to team up with Edward, as she had been wounded by the troops during the last fight and was unable to conduct a proper investigation on her own. Edward was sent to Havana's marketplace to look for clues regarding a recent rash of thefts and mischief, while Rhona stayed at the bureau to do some research of her own.<ref name="Thief in the Market">''Assassin's Creed IV: Black Flag'' – [[A Thief in the Market]]</ref> | |||
[[File:Arms Race 1.png|thumb|left|250px|Rhona and Edward making plans to sabotage Flint]] | |||
After acquiring a [[Pickpocketing|pickpocket]]'s [[map]] that revealed the locations of storehouses used by Hilary Flint, Edward returned to Rhona. She too had discovered the Templar's operation and realized his attempts to eliminate the Havana Assassins through running an arms race, which was being funded by thieves and pickpockets. By this point, Flint had accumulated a large stock of gunpowder, which he kept stored throughout the city for eventual use against the Assassins.<ref name="Arms Race">''Assassin's Creed IV: Black Flag'' – [[Arms Race]]</ref> | |||
With the map procured by Edward, the pair located and destroyed three gunpowder storages, thus depleting Flint's stores and eliminating his advantage.<ref name="Arms Race"/> This final act brought Flint out into the open; he promptly went to the docks to move the rest of his powder offshore.<ref name="Flint's End">''Assassin's Creed IV: Black Flag'' – [[Flint's End]]</ref> | |||
Rhona and Edward then devised a final plan wherein she would distract Flint while Edward moved in for the kill. Although Rhona seemed anxious about carrying it out, the pair nonetheless succeeded in bypassing Flint's troops and eliminating him. In his final moments, Flint lamented that he and Rhona had not had the chance to fight together on the "correct side of things"; after Flint had succumbed to his wounds, Rhona took his Templar key and handed it to Edward.<ref name="Flint's End"/> | |||
===Locating Laureano Torres=== | |||
{{Dialogue2|Edward|Is Havana under curfew on my account?|Rhona|Hm, aye. Torres seems to think someone's coming after him.|He's not wrong...|Rhona and Edward discussing Torres, 1722.|Assassin's Creed IV: Black Flag|Tainted Blood}} | |||
[[File:Tainted Blood 4.png|thumb|250px|Edward giving the Crystal Skull to Rhona]] | |||
In 1722, Rhona was reunited with Edward, who had come to Havana to hunt down [[Grand Master of the Templar Order|Grand Master]] [[Laureano de Torres y Ayala]], though Edward found the city to be on high alert. He showed Rhona the [[Crystal Skulls|Crystal Skull]] from the [[Observatory (Isu)|Observatory]] and inserted Torres' [[Blood vials|blood vial]] into it, activating the artifact and demonstrating its purpose. Awed by the device, Rhona identified the projection as Havana's [[Cathedral of Havana|church]], following which she was given the Skull for safekeeping, while Edward left to track down Torres.<ref name="Tainted Blood">''Assassin's Creed IV: Black Flag'' – [[Tainted Blood]]</ref> | |||
Edward later returned to her bureau, revealing that the man he had assassinated had been a decoy, and instructed Rhona to warn [[Ah Tabai]] that Torres was headed for the Observatory. Rhona then returned the Skull to Edward, following which the captain headed after his target.<ref name="Tainted Blood"/> | |||
===Later life=== | |||
{{Quote|I am as busy as I have ever been, but, it all feels so terribly bland. What happened to the grand adventures that saw us racing against the Templars for a powerful artefact that time forgot?|Rhona reminiscing about her younger years, 1751.|Assassin's Creed: Rogue}} | |||
With the death of Torres in 1722, Rhona was able to expand her branch of Assassins, securing full control of Havana for years to come. As the [[Seven Years' War]] loomed, she focused on keeping the city safe from territorial squables, but missed the "grand adventures" she had experienced in her youth. The Templar [[Rafael Joaquín de Ferrer]] took advantage of this and seduced Rhona in 1751, using the opportunity to steal her correspondence with other Assassins, as well as several ancient maps of the [[Yucatán Peninsula]] that she been bequeathed by Ah Tabai.<ref name="ACRG">''[[Assassin's Creed: Rogue]]'' – [[War Letters]]: "A Thief in the Night"</ref> | |||
Although her Assassins wanted to go after de Ferrer, Rhona decided to keep them stationed in Havana, hoping to safeguard the city against a conflict between Empires. She then wrote to [[Achilles Davenport]], whom she knew from the time that he trained under Ah Tabai, asking him to keep an eye out for de Ferrer and to eliminate him if possible.<ref name="ACRG"/> | |||
==Personality and traits== | |||
{{Quote|Hm... I see you haven't lost your charm.|Edward to Rhona, 1717.|Assassin's Creed IV: Black Flag|Bureau Under Attack}} | |||
Not afraid of speaking her mind, Rhona's weapon in conversations was wit and sarcasm. In her interactions with Edward Kenway, she rarely missed an opportunity to poke fun at his lesser qualities, for she knew him to be a troublemaker. In a similar manner, she tended to make light of certain situations, even dangerous ones that she found herself in.<ref name="AC4">''Assassin's Creed IV: Black Flag''</ref> | |||
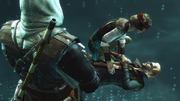
[[File:Bureau_Under_Attack_1.png|thumb|250px|left|Edward meeting Rhona at the Havana bureau]] | |||
Despite this tough front, Rhona was actually quite compassionate and friendly, as her jokes at Edward's expense quickly ceased once he proved himself trustworthy. When Edward returned to Havana as an ally of the Assassins, she greeted him warmly and even sent him off on his mission with a hug, wishing him good luck. As well as this, Rhona showed reluctance in killing Hilary Flint herself, since she still had some lingering affection for him, in spite of their conflicted relationship and his position as a Templar.<ref name="AC4"/> | |||
===Skills and equipment=== | |||
As evidenced by her position of Master Assassin, Rhona was capable of holding her own against multiple enemies, using explosives and mid-range weaponry to thin out attackers before defeating the remaining ones in close combat. Although she possessed the traditional pair of [[Hidden Blade]]s, she primarily used her [[sword]] and [[Firearm|flintlock]] [[pistol]]s, with which she was very proficient. Her position as leader of Havana's Assassin bureau also required her to be familiar with the city's general layout and activities.<ref name="AC4"/> | |||
==Trivia== | |||
*Rhona is a name derived from either the masculine Ronald, the meaning of which is "well-advised ruler", or the {{Wiki|Hebrides|Hebridean}} island Rona. Dinsmore is a surname of Scottish origin, referring to the old lands of Dundemore near Lindores, Fife. It is composed of the Old Gaelic elements ''dun(dh)'', meaning "fort", and ''mor'', meaning "big, extensive". | |||
*[[Melanie Lemay]] speculated in several [[Abstergo Entertainment]] database entries that Rhona had actually been a con artist, claiming it would explain the Assassin's constant transition from place to place. | |||
*Out of the four Assassins with whom Edward worked together to acquire the Templar keys, Rhona was the only one that could potentially take out the Templar target herself. | |||
*Rhona's bureau is presumably responsible for the Assassins who were sent to rescue [[Bartholomew Roberts]] from Templar custody given that this mission occurs in Havana, though unlike Ah Tabai, she does not seem to hold any anger towards Edward for his role in the Assassins' deaths. | |||
==Gallery== | |||
<gallery captionalign="center" position="center" widths="180"> | |||
Concept Art- Rhona Dinsmore.jpg|Concept art of Rhona Dinsmore | |||
Bureau Under Attack 2.png|Rhona firing at her attackers | |||
A Thief in the Market 2.png|Rhona asking for Edward's assistance | |||
Flint's End 4.png|Edward and Rhona with the dying Flint | |||
Flint's End 5.png|Rhona giving Flint's Templar key to Edward | |||
Tainted Blood 3.png|Rhona and Edward looking at the Crystal Skull's projection | |||
Tainted Blood 13.png|Rhona, Edward and Anne at the bureau | |||
</gallery> | |||
==Appearances== | |||
*''[[Assassin's Creed IV: Black Flag]]'' {{1st}} | |||
*''[[Assassin's Creed: Black Flag]]'' | |||
*''[[Assassin's Creed: Rogue]]'' {{Mo}} | |||
==References== | |||
{{Reflist}} | |||
{{AC4}} | {{AC4}} | ||
{{DEFAULTSORT:Dinsmore, Rhona}} | |||
<!--[de:Rhona Dinsmore] | |||
[es:Rhona Dinsmore] | |||
[fr:Rhona Dinsmore] | |||
[hu:Rhona Dinsmore] | |||
[it:Rhona Dinsmore] | |||
[pl:Rhona Dinsmore] | |||
[ru:Рона Динсмур] | |||
[zh:罗娜·丁斯莫尔]--> | |||
[[Category:1688 births]] | |||
[[Category:Individuals]] | |||
[[Category:Scottish people]] | |||
[[Category:Farmers]] | |||
[[Category:Assassins]] | |||
[[Category:Caribbean Assassins]] | |||
[[Category:Master Assassins]] | |||
[[Category:Assassin bureau leaders]] | |||
[[Category:Individuals who held Pieces of Eden]] | |||
Latest revision as of 00:44, 10 July 2026
Rhona Dinsmore (born 1688) was a Scottish Master Assassin of the West Indies Brotherhood who led the bureau in Havana during the early-to-mid 18th century.
Biography[edit | edit source]
Early life[edit | edit source]
Rhona was born in Glasgow to an absent father and an alcoholic mother. Leaving her depressed household in her mid-teens, she found work among merchants in Bristol at the age of nineteen and remained at said post for almost two years.[1]
By the age of twenty-one, Rhona became trapped in a distressing marriage. She fled once again, traveling to the New World and seeking refuge in Boston, where she remained for six months, before moving to Jamaica. With work among farmers being exceedingly difficult to find, Rhona took to the sea and found her calling with the Assassins. Her dedication to the Order eventually led her to be promoted to the position of bureau leader.[1]
For several years, Rhona was in a conflicted relationship of undetermined nature with Hilary Flint, an English Templar. During her time in the West Indies, she also became loosely acquainted with the pirate Edward Kenway.[2]
Conflict with Hilary Flint[edit | edit source]
In July 1715, the location of Rhona's bureau was unknowingly revealed to the Templars by Edward, who had delivered them maps—created by the traitorous Assassin Duncan Walpole—which detailed the whereabouts of various Assassin encampments in the Caribbean.[3] Consequently, Rhona's bureau was repeatedly besieged by Spanish troops.[2]
During one of these attacks in 1717, Rhona was joined by Edward, who had come to make amends on the suggestion of James Kidd. Together, the pair managed to withstand the onslaught of guards, following which Kenway requested Rhona's assistance in locating a Templar key required to access a set of robes at his base in Great Inagua. Rhona asked him how he would respond if she were to take the robes for herself, to which Kenway pointed out that they would not fit her.[2]
Reluctantly, Rhona agreed to team up with Edward, as she had been wounded by the troops during the last fight and was unable to conduct a proper investigation on her own. Edward was sent to Havana's marketplace to look for clues regarding a recent rash of thefts and mischief, while Rhona stayed at the bureau to do some research of her own.[4]

After acquiring a pickpocket's map that revealed the locations of storehouses used by Hilary Flint, Edward returned to Rhona. She too had discovered the Templar's operation and realized his attempts to eliminate the Havana Assassins through running an arms race, which was being funded by thieves and pickpockets. By this point, Flint had accumulated a large stock of gunpowder, which he kept stored throughout the city for eventual use against the Assassins.[5]
With the map procured by Edward, the pair located and destroyed three gunpowder storages, thus depleting Flint's stores and eliminating his advantage.[5] This final act brought Flint out into the open; he promptly went to the docks to move the rest of his powder offshore.[6]
Rhona and Edward then devised a final plan wherein she would distract Flint while Edward moved in for the kill. Although Rhona seemed anxious about carrying it out, the pair nonetheless succeeded in bypassing Flint's troops and eliminating him. In his final moments, Flint lamented that he and Rhona had not had the chance to fight together on the "correct side of things"; after Flint had succumbed to his wounds, Rhona took his Templar key and handed it to Edward.[6]
Locating Laureano Torres[edit | edit source]

In 1722, Rhona was reunited with Edward, who had come to Havana to hunt down Grand Master Laureano de Torres y Ayala, though Edward found the city to be on high alert. He showed Rhona the Crystal Skull from the Observatory and inserted Torres' blood vial into it, activating the artifact and demonstrating its purpose. Awed by the device, Rhona identified the projection as Havana's church, following which she was given the Skull for safekeeping, while Edward left to track down Torres.[7]
Edward later returned to her bureau, revealing that the man he had assassinated had been a decoy, and instructed Rhona to warn Ah Tabai that Torres was headed for the Observatory. Rhona then returned the Skull to Edward, following which the captain headed after his target.[7]
Later life[edit | edit source]
- "I am as busy as I have ever been, but, it all feels so terribly bland. What happened to the grand adventures that saw us racing against the Templars for a powerful artefact that time forgot?"
- ―Rhona reminiscing about her younger years, 1751.[src]
With the death of Torres in 1722, Rhona was able to expand her branch of Assassins, securing full control of Havana for years to come. As the Seven Years' War loomed, she focused on keeping the city safe from territorial squables, but missed the "grand adventures" she had experienced in her youth. The Templar Rafael Joaquín de Ferrer took advantage of this and seduced Rhona in 1751, using the opportunity to steal her correspondence with other Assassins, as well as several ancient maps of the Yucatán Peninsula that she been bequeathed by Ah Tabai.[8]
Although her Assassins wanted to go after de Ferrer, Rhona decided to keep them stationed in Havana, hoping to safeguard the city against a conflict between Empires. She then wrote to Achilles Davenport, whom she knew from the time that he trained under Ah Tabai, asking him to keep an eye out for de Ferrer and to eliminate him if possible.[8]
Personality and traits[edit | edit source]
Not afraid of speaking her mind, Rhona's weapon in conversations was wit and sarcasm. In her interactions with Edward Kenway, she rarely missed an opportunity to poke fun at his lesser qualities, for she knew him to be a troublemaker. In a similar manner, she tended to make light of certain situations, even dangerous ones that she found herself in.[9]

Despite this tough front, Rhona was actually quite compassionate and friendly, as her jokes at Edward's expense quickly ceased once he proved himself trustworthy. When Edward returned to Havana as an ally of the Assassins, she greeted him warmly and even sent him off on his mission with a hug, wishing him good luck. As well as this, Rhona showed reluctance in killing Hilary Flint herself, since she still had some lingering affection for him, in spite of their conflicted relationship and his position as a Templar.[9]
Skills and equipment[edit | edit source]
As evidenced by her position of Master Assassin, Rhona was capable of holding her own against multiple enemies, using explosives and mid-range weaponry to thin out attackers before defeating the remaining ones in close combat. Although she possessed the traditional pair of Hidden Blades, she primarily used her sword and flintlock pistols, with which she was very proficient. Her position as leader of Havana's Assassin bureau also required her to be familiar with the city's general layout and activities.[9]
Trivia[edit | edit source]
- Rhona is a name derived from either the masculine Ronald, the meaning of which is "well-advised ruler", or the Hebridean island Rona. Dinsmore is a surname of Scottish origin, referring to the old lands of Dundemore near Lindores, Fife. It is composed of the Old Gaelic elements dun(dh), meaning "fort", and mor, meaning "big, extensive".
- Melanie Lemay speculated in several Abstergo Entertainment database entries that Rhona had actually been a con artist, claiming it would explain the Assassin's constant transition from place to place.
- Out of the four Assassins with whom Edward worked together to acquire the Templar keys, Rhona was the only one that could potentially take out the Templar target herself.
- Rhona's bureau is presumably responsible for the Assassins who were sent to rescue Bartholomew Roberts from Templar custody given that this mission occurs in Havana, though unlike Ah Tabai, she does not seem to hold any anger towards Edward for his role in the Assassins' deaths.
Gallery[edit | edit source]
-
 Concept art of Rhona Dinsmore
 -
 Rhona firing at her attackers
 -
 Rhona asking for Edward's assistance
 -
 Edward and Rhona with the dying Flint
 -
 Rhona giving Flint's Templar key to Edward
 -
 Rhona and Edward looking at the Crystal Skull's projection
 -
 Rhona, Edward and Anne at the bureau


Appearances[edit | edit source]
- Assassin's Creed IV: Black Flag (first appearance)
- Assassin's Creed: Black Flag
- Assassin's Creed: Rogue (mentioned only)
References[edit | edit source]
- ↑ 1.0 1.1 Assassin's Creed IV: Black Flag – Database: Rhona Dinsmore
- ↑ 2.0 2.1 2.2 Assassin's Creed IV: Black Flag – Bureau Under Attack
- ↑ Assassin's Creed IV: Black Flag – Mister Walpole, I Presume?
- ↑ Assassin's Creed IV: Black Flag – A Thief in the Market
- ↑ 5.0 5.1 Assassin's Creed IV: Black Flag – Arms Race
- ↑ 6.0 6.1 Assassin's Creed IV: Black Flag – Flint's End
- ↑ 7.0 7.1 Assassin's Creed IV: Black Flag – Tainted Blood
- ↑ 8.0 8.1 Assassin's Creed: Rogue – War Letters: "A Thief in the Night"
- ↑ 9.0 9.1 9.2 Assassin's Creed IV: Black Flag