Rhona Dinsmore: Difference between revisions
imported>Bovkaffe No edit summary |
imported>Unrulyruby100 No edit summary |
||
| Line 1: | Line 1: | ||
{{Era|AC4|Assassins}} | {{Era|AC4|Assassins}} | ||
{{Stub}} | {{Stub}} | ||
{{Character Infobox | {{Character Infobox | ||
|image = | |image = RhonaDinsmorerender.png | ||
|birth = 1688<br>{{Wiki|Glasgow}}, {{Wiki|Kingdom of Scotland}} | |birth = 1688<br>{{Wiki|Glasgow}}, {{Wiki|Kingdom of Scotland}} | ||
|death = | |death = | ||
| Line 9: | Line 8: | ||
|appear = ''[[Assassin's Creed IV: Black Flag]]''<br>''[[Assassin's Creed: Black Flag (novel)]]'' | |appear = ''[[Assassin's Creed IV: Black Flag]]''<br>''[[Assassin's Creed: Black Flag (novel)]]'' | ||
|voice = [[Lynsey-Anne Moffat]]}} | |voice = [[Lynsey-Anne Moffat]]}} | ||
'''Rhona Dinsmore''' (1688 – unknown) was the leader of the bureau of [[Assassins]] operating in [[Havana]] during the [[Golden Age of Piracy]]. | '''Rhona Dinsmore''' (1688 – unknown) was the leader of the [[Assassin bureau|bureau]] of [[Assassins]] operating in [[Havana]] during the [[Golden Age of Piracy]]. | ||
==Biography== | ==Biography== | ||
| Line 18: | Line 17: | ||
===Templar hunt=== | ===Templar hunt=== | ||
In 1715, Rhona's | In 1715, Rhona's bureau in Havana was sold out to the [[Templars]] by the traitorous Assassin [[Duncan Walpole]] and delivered by [[Edward Kenway]]. To make penance, Edward arrived two years later to assist Rhona as she was being besieged by [[Spain|Spanish]] troops. | ||
After fending off the attack, Kenway requested Rhona's assistance in locating the Templar key required to access a set of robes at his base in [[Great Inagua]]. Rhona asked him how he would respond if she were to take the robes for herself, to which Kenway pointed out that they would not fit her. Reluctantly, she agreed to help him in exchange for defeating the Templars in Havana, | After fending off the attack, Kenway requested Rhona's assistance in locating the [[Templar keys|Templar key]] required to access a set of robes at his base in [[Great Inagua]]. Rhona asked him how he would respond if she were to take the robes for herself, to which Kenway pointed out that they would not fit her. Reluctantly, she agreed to help him in exchange for defeating the Templars in Havana, as she had been wounded by the troops during the fight and couldn't conduct a proper investigation on her own. | ||
Edward searched Havana's marketplace for clues, finding a [[Pickpocketing|pickpocket]] running from a group of Spanish troops. After killing both the thief and the soldiers, Kenway looted the man's body, finding a letter revealing that the pickpocket, along with several other thieves, had been funding the Templar commander [[Hilary Flint]] and his attempts to eliminate the Havana Assassins through an arms race. | Edward searched Havana's marketplace for clues, finding a [[Pickpocketing|pickpocket]] running from a group of Spanish troops. After killing both the thief and the soldiers, Kenway looted the man's body, finding a letter revealing that the pickpocket, along with several other thieves, had been funding the Templar commander [[Hilary Flint]] and his attempts to eliminate the Havana Assassins through an arms race. | ||
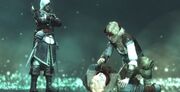
[[File:RhonaHilary.png|thumb|250px|left|Rhona at Hilary Flint's deathbed]] | |||
By this point, Flint had accumulated a large stock of gunpowder, which he kept stored throughout the city. To eliminate Hilary's advantage, Kenway located and destroyed four gunpowder kegs, depleting the Templar's stores. This final act brought Flint out into the open, and he went to the docks to move the rest of his powder offshore. Rhona and Edward devised a final plan wherein she would distract Hilary while Edward moved in for the kill. While Rhona seemed anxious over carrying it out, she nonetheless drew Flint's attention long enough for Edward to strike. With his final words, Flint lamented that he and Rhona hadn't had the chance to fight together on the same side. | |||
===Locating Torres=== | ===Locating Torres=== | ||
[[File:Tainted Blood 4.png|thumb|250px|Edward giving the Crystal Skull to Rhona]] | [[File:Tainted Blood 4.png|thumb|250px|Edward giving the Crystal Skull to Rhona]] | ||
By 1721, Edward revisited Rhona while on the hunt for [[Grand Master]] [[Laureano de Torres y Ayala]], | By 1721, Edward revisited Rhona while on the hunt for [[Grand Master]] [[Laureano de Torres y Ayala]], to find that Havana had been placed on high alert. Edward showed Rhona the [[Crystal Skulls|Crystal Skull]] from the [[Observatory]] and inserted Torres' [[Blood vials|blood vial]] into it, showing his location. Before leaving to track down Torres, Edward gave the Skull to Rhona for protection. | ||
Edward later returned to her bureau, revealing that the man he assassinated was a decoy, and instructed Rhona to warn [[Ah Tabai]] that Torres was headed for the Observatory. Rhona returned the Skull to Edward, and the captain headed after his target. | Edward later returned to her bureau, revealing that the man he assassinated was a decoy, and instructed Rhona to warn [[Ah Tabai]] that Torres was headed for the Observatory. Rhona returned the Skull to Edward, and the captain headed after his target. | ||
| Line 37: | Line 36: | ||
<gallery captionalign="center" position="center" spacing="small" widths="180"> | <gallery captionalign="center" position="center" spacing="small" widths="180"> | ||
Concept Art- Rhona Dinsmore.jpg|Concept art of Rhona Dinsmore | Concept Art- Rhona Dinsmore.jpg|Concept art of Rhona Dinsmore | ||
RhonaKenway2.png|Rhona meeting Edward at the Havana bureau | |||
Rhonabureau2.png|Rhona defending the bureau | |||
RhonaKenway.png|Rhona asking for Edward's assistance | |||
HilaryFlintTemplarkey.jpg|Rhona taking Flint's Templar key | |||
Rhonakey.png|Rhona giving Flint's Templar key to Edward | |||
Tainted Blood 3.png|Rhona and Edward looking at the Crystal Skull | Tainted Blood 3.png|Rhona and Edward looking at the Crystal Skull | ||
RhonaEdwardTaintedBlood.png|Rhona wishing Edward luck on his mission | |||
</gallery> | </gallery> | ||
Revision as of 00:29, 22 June 2014
Rhona Dinsmore (1688 – unknown) was the leader of the bureau of Assassins operating in Havana during the Golden Age of Piracy.
Biography
Early life
Rhona was born in Glasgow, Scotland to an absent father and an alcoholic mother. She left home in her mid-teens, and found work among merchants in Bristol at the age of nineteen, remaining at that post for almost two years.
At the age of twenty-one, Rhona was trapped in a distressing marriage. She fled once again, travelling to the New World, and seeking refuge in Boston. She remained there for six months, before moving to Jamaica. With work among farmers being exceedlingly difficult to find, Rhona took to the sea, eventually finding her calling with the Assassins.
Templar hunt
In 1715, Rhona's bureau in Havana was sold out to the Templars by the traitorous Assassin Duncan Walpole and delivered by Edward Kenway. To make penance, Edward arrived two years later to assist Rhona as she was being besieged by Spanish troops.
After fending off the attack, Kenway requested Rhona's assistance in locating the Templar key required to access a set of robes at his base in Great Inagua. Rhona asked him how he would respond if she were to take the robes for herself, to which Kenway pointed out that they would not fit her. Reluctantly, she agreed to help him in exchange for defeating the Templars in Havana, as she had been wounded by the troops during the fight and couldn't conduct a proper investigation on her own.
Edward searched Havana's marketplace for clues, finding a pickpocket running from a group of Spanish troops. After killing both the thief and the soldiers, Kenway looted the man's body, finding a letter revealing that the pickpocket, along with several other thieves, had been funding the Templar commander Hilary Flint and his attempts to eliminate the Havana Assassins through an arms race.
By this point, Flint had accumulated a large stock of gunpowder, which he kept stored throughout the city. To eliminate Hilary's advantage, Kenway located and destroyed four gunpowder kegs, depleting the Templar's stores. This final act brought Flint out into the open, and he went to the docks to move the rest of his powder offshore. Rhona and Edward devised a final plan wherein she would distract Hilary while Edward moved in for the kill. While Rhona seemed anxious over carrying it out, she nonetheless drew Flint's attention long enough for Edward to strike. With his final words, Flint lamented that he and Rhona hadn't had the chance to fight together on the same side.
Locating Torres

By 1721, Edward revisited Rhona while on the hunt for Grand Master Laureano de Torres y Ayala, to find that Havana had been placed on high alert. Edward showed Rhona the Crystal Skull from the Observatory and inserted Torres' blood vial into it, showing his location. Before leaving to track down Torres, Edward gave the Skull to Rhona for protection.
Edward later returned to her bureau, revealing that the man he assassinated was a decoy, and instructed Rhona to warn Ah Tabai that Torres was headed for the Observatory. Rhona returned the Skull to Edward, and the captain headed after his target.
Gallery
-
 Concept art of Rhona Dinsmore
 -
Rhona meeting Edward at the Havana bureau
-
Rhona defending the bureau
-
Rhona asking for Edward's assistance
-
 Rhona taking Flint's Templar key
 -
Rhona giving Flint's Templar key to Edward
-
 Rhona and Edward looking at the Crystal Skull
 -
 Rhona wishing Edward luck on his mission


Reference