Edward Kenway: Difference between revisions
imported>Nevadaprince |
imported>Kainzorus Prime Undo revision 521701 by Nevadaprince (talk) |
||
| Line 225: | Line 225: | ||
*Edward's Hidden Blades possessed [[Assassin insignia]] engraved on the mechanism, while the right blade also showed a small skull below the insignia, referencing the fact he was both a pirate and an Assassin. | *Edward's Hidden Blades possessed [[Assassin insignia]] engraved on the mechanism, while the right blade also showed a small skull below the insignia, referencing the fact he was both a pirate and an Assassin. | ||
*Voice actor/motion capture provider [[Matt Ryan]] initially chose to portray Edward with a {{Wiki|Manchester dialect|Mancunian accent}} during casting call. However, after the developers heard Ryan's natural {{Wiki|Welsh English|Welsh accent}} they asked him to voice Kenway instead with a South-Welsh English accent. They then chose to rewrite Kenway's backstory to fit Ryan's accent.<ref>[http://www.gamesradar.com/creating-edward-kenway-assassins-creed-4/ GamesRadar: ''Creating Edward Kenway in Assassin's Creed 4: Black Flag'']</ref><ref>[http://www.walesonline.co.uk/lifestyle/pirate-hero-new-assassins-creed-6074652 WalesOnline ''Pirate Hero: New Assassin's Creed'']</ref> | *Voice actor/motion capture provider [[Matt Ryan]] initially chose to portray Edward with a {{Wiki|Manchester dialect|Mancunian accent}} during casting call. However, after the developers heard Ryan's natural {{Wiki|Welsh English|Welsh accent}} they asked him to voice Kenway instead with a South-Welsh English accent. They then chose to rewrite Kenway's backstory to fit Ryan's accent.<ref>[http://www.gamesradar.com/creating-edward-kenway-assassins-creed-4/ GamesRadar: ''Creating Edward Kenway in Assassin's Creed 4: Black Flag'']</ref><ref>[http://www.walesonline.co.uk/lifestyle/pirate-hero-new-assassins-creed-6074652 WalesOnline ''Pirate Hero: New Assassin's Creed'']</ref> | ||
==Gallery== | ==Gallery== | ||
Revision as of 12:59, 21 November 2013

|
He who increaseth knowledge, increaseth sorrow. This article contains spoilers, meaning it has information and facts concerning recent or upcoming releases from the Assassin's Creed series. If you do not want to know about these events, it is recommended to read on with caution, or not at all. |

|
Ezio, my friend! How may I be of service? This article is in desperate need of a revamp. Please improve it in any way necessary in order for it to achieve a higher standard of quality in accordance with our Manual of Style. |
- "You're a good man, Edward, and if you learn to keep settled in one place for more than a week, you'll make a fine father too."
- ―Anne Bonny to Edward Kenway, who is expecting the arrival of his daughter, 1722.[src]
Edward James Kenway (1693 – 1735) was a Welsh-born British privateer-turned-pirate and a member of the Assassin Order.
Edward joined the British Royal Navy early in his life and, once accepted, found himself stationed in the West Indies. However, a quick end to the war and the promise of gold, glory and fame eventually seduced him into a life of piracy; it was during this quest that Edward first encountered the Assassin and Templar Orders, and became embroiled in their struggle.
Over the next few years, Edward struggled with the internal conflict that arose from his desire for fame and riches – through the finding of the Observatory - and what he saw as his recompense for bringing death and destruction upon the Assassins. Eventually, Edward chose to entrust the Observatory to the Assassins, and elected to join their Creed.
Edward was the father of Haytham Kenway and the grandfather of Ratonhnhaké:ton; through this line, he is an ancestor of William Miles, and his son, Desmond.
In 2013, an Abstergo Entertainment research analyst was tasked with exploring Edward's genetic memories in order to gather footage for a planned video game; Pirates of Nightmares.
Biography
Early life and first marriage
Edward was born in Swansea, Wales, to Bernard Kenway and Linette Hopkins; at the age of ten, his family relocated to a farm in Bristol, in South West England. However, the pastoral life did not agree with Edward and he became a well-known troublemaker in his adolescence. [3]
At the age of seventeen, Edward met Caroline Scott, a woman two years his senior who intervened on his behalf during an altercation outside a tavern. They were married within a year, and Caroline became pregnant with a daughter, Jennifer Scott, unbeknownst to Edward.
Their marriage soon proved problematic as Caroline grew tired of Edward's inability to find steady work or take his responsibilities as a husband seriously. Ultimately, Edward's grandiose ideas about sailing as a privateer in the West Indies led to their estrangement, and she left to live with her parents prior to his departure. It was at this time that Caroline learned of her pregnancy, but chose to keep the fact from Edward.[4]
Life as a privateer and pirate
Determined to prove his worth, Edward pursued his dreams of being a privateer; in late 1712, he boarded a ship chartered for Jamaica with the intention of sailing under the renowned privateer, Benjamin Hornigold. He remained in Jamaica for six months until the Treaty of Utrecht in early 1713, which effectively ended all conflict between the major empires. As a result, British privateers were no longer needed or tolerated in the West Indies, causing Edward to find himself out of work. He subsequently took to piracy and began working aboard a schooner.
In early 1715, Edward's ship attacked a passing vessel which proved to be too much for the crew to handle. With their Captain dead, Edward took the helm and did his best to keep the ship afloat, but to no avail. Shipwrecked in Cape Bonavista, Edward met the only other survivor - an Assassin named Duncan Walpole – whose ship the pirates had attacked.
Washing up next to Edward, Walpole offered to pay Edward for passage to Havana; Edward agreed upon condition of immediate payment, and advanced toward Walpole. Concerned, Walpole drew his pistol, but it misfired due to the gunpowder being wet. Walpole fled, and Edward pursued him through the jungle, eventually dueling and killing him.
Looting Walpole's body, Edward found a letter from Governor Laureano de Torres y Ayala of Havana, detailing Walpole's intended defection to the Templar Order. Oblivious to the implications of the letter, Edward donned Walpole's Assassin robes (though he discarded the broken Hidden Blade) and collected a crystalline rectangular prism which was to be delivered to Torres for payment.
Edward shortly encountered a group of English soldiers harassing a merchant named Stede Bonnet, whom they believed to have been one of the pirates involved in the earlier battle. After dispatching the soldiers, Edward introduced himself to Bonnet using Walpole's name and accompanied him to Havana. [4]
Introduction to the Templars
Upon arriving, the two traveled to a local tavern to meet with Bonnet's contact, where several thugs recognized Edward as a pirate and provoked him into a fight. After dispatching the men, Edward was forced to flee as Spanish soldiers entered the tavern and began to chase him. While he was able to escape, the Spanish turned on Bonnet and seized his ship's holdings, including the package meant for Torres. Edward infiltrated the Spanish fort to recover the package before going to the intended meeting with Torres.
Edward carefully maintained his charade as he conversed with soon-to-be-Templars Woodes Rogers, whose wife had met Duncan, and Julien du Casse. du Casse equipped Edward with a pair of Hidden Blades and requested that Edward show them some Assassin techniques in action; picking up on hints from du Casse and Rogers, Edward was able to replicate the move set with relative accuracy.
When Torres eventually arrived, Rogers, du Casse and "Walpole" were inducted into the Templar Order. Edward listened to Torres' plans to locate a First Civilization site known as the Observatory, which the Templars believed would allow them to monitor every person in the world and learn all their secrets. Uninterested, Edward took the opportunity to pickpocket the Templars as they discussed their plans.
The four then traveled to the city docks to retrieve a man named Bartholomew Roberts, an alleged Sage who knew the Observatory's location. On the way back to the governor's house, they were ambushed by Assassins and Roberts fled, though Edward managed to chase him down retrieve him. As Roberts was led away, Torres gave Edward Walpole's intended pay for a job well done - 1000 reales.
Later, meeting with Bonnet, Edward complained about the pay he had received, believing it was insufficient. He then resolved to discover the Observatory's location and sell it to the highest bidder, and realized he would need the Sage's assistance. He infiltrated the prison where Roberts was being held, only to find the Sage gone and the Templars, having discovered his ruse, waiting for him. Torres then exiled Edward to a prison convoy for robbing him of Walpole's valuable expertise.
Arrival in Nassau
Edward managed to escape confinement with the help of a similarly imprisoned Adéwalé, recruit a number of other prisoners, and steal one of the fleet's ships in the process. Hit by a storm, they narrowly managed to escape before the entire accompanying fleet was sunk. Edward decided to name his newly acquired ship Jackdaw and, correctly realizing that hardly any of his new crew would accept Adéwalé as captain, dubbed him Quartermaster.

Heading to Nassau with his new ship, Edward introduced Adéwalé to three of his old associates: Edward Thatch, James Kidd and Benjamin Hornigold. Edward moved throughout the British-occupied town, freeing imprisoned pirates to recruit as crewmen. He then began working with Hornigold and Kidd to carry out lucrative missions, plundering ships and raiding a nearby plantation.
Thatch shared with Edward his concerns about protecting their newly formed "Pirate Republic" from British recapture, and proposed a plan to take a particular Spanish Galleon that he knew of in order to better protect the nascent revolutionary state. At his request, Edward located and tailed the Galleon to Great Inagua, only to learn that the ship was owned by none other than Julien du Casse. Reasoning that du Casse could not be allowed to live in case the other Templars learned of his escape, Edward approached the cove through the jungle, and made his way to the village where du Casse's Galleon was docked. Edward then snuck aboard the ship and killed du Casse.
With du Casse dead, James Kidd congratulated Edward on his victory, and brought him to a Mayan stela in the jungle, telling him to use "the light of life" to uncover the treasure to which it pointed. Kidd then showed Edward an underground tunnel leading to the du Casse manor and the special armor locked away there, and proposed that Edward keep the island as his base. He also requested that Edward meet him in Tulum, as he had more to show Edward there.[4]
Introduction to the Assassins
- "Jaysus, Kidd! You led me into a mess. Is it these monks guarding the treasure you promised me?"
- ―Edward Kenway to James Kidd, 1716.[src]
Arriving in Tulum, Edward found himself having to sneak through the jungle to meet with Kidd. Upon their eventual meeting, Edward was set upon by Ah Tabai, who demanded to know why Edward had sold their location to the Templars, and if he had seen the Sage, Bartholomew Roberts. Edward confirmed that he had, but soon found himself in the midst of a Templar attack.
Edward aided the Assassins in their fight, freeing several who had been captured and earning the appreciation of Ah Tabai, though he held firm that Edward was not welcome in Tulum any longer.[4]
In pursuit of Roberts
- Torres: "Two years ago we offered a reward for the Sage's recapture. Today someone claims to have found him. This gold is his ransom."
- Edward: "Who found him?"
- Torres: "A slaver by the name of Laurens Prins. He lives in Kingston."
- Edward: "We like this story, Torres. And we want to help you finish it. But we're going to do it our way. Using you and your gold."
- — Laureano de Torres and Edward discuss Roberts, 1716.[src]
Upon his return to Nassau, Edward learned from Charles Vane and Jack Rackham that Governor Torres of Cuba was residing in a fort, with a sizable amount of gold, that Charles aimed to steal. Undercutting him, Edward quickly sailed to Torres' location and captured the fort.
Inquiring about Roberts, Edward learned that he had been captured by a Kingston-based slaver name Laurens Prins, who was ransoming him to the Templars. Edward decided to use the opportunity to reach Roberts himself, and coerced Torres into aiding him.[4] When they arrived in Kingston, Edward started to tail Torres, only to discover James Kidd was also pursuing Prins, intending to assassinate him.
Reluctantly, James agreed to Edward's request not to assassinate both Torres and Prins, at least until they had uncovered the Sage's location. Despite being detected, the two eventually tracked Prins down to his manor in the north of the city. Edward agreed to aid James in the infiltration, and the assassination of Prins. James, correctly noticing that they would not be able to get far through stealth alone against such a heavily guarded complex elected to act as a distraction; removing her bandanna and reddening her lips, James revealed herself to be a woman.
Edward quickly overcame his confusion and, using "James'" distraction, snuck into the manor's gardens, using the opportunity to kill Prins. Moments later, Edward was surprised by Roberts, holding "James" at gunpoint, who revealed that he was in fact working for Prins, but was not surprised to hear about his intending betrayal. Shooting the alarm bell, Roberts made his escape, followed shortly thereafter by his two would-be rescuers.[4]
Medicines for Nassau
- Thatch: "Caution's nothing without charisma! For if a man plays the fool, then it's only fools he'll persuade. But appear to be the devil, and all men will submit."
- Kenway: "And would you be the devil?"
- Thatch: "For an audience, aye. It's all a big show. Give your quarry something to fear, some hellish thing from a fever'd dream, and men will drop to their knees pleading for their Lord before aught else!"
- —Edwards Thatch and Kenway discuss the use of intimidation over force, 1718.[src]

The following year, in 1718, word reached Nassau of a general pardon, for all pirates, being issued by Woodes Rogers – the new Governor of the Bahamas. Thatch and Hornigold disagreed on how they should deal with it; the former favoring the use of force to keep their Pirate Republic alive, the latter a period of quiet to turn prying eyes away from Nassau. Hornigold stated that without proper care, and indeed medicine, Nassau was not worth attempting to save. Edward, who had been listening to the conversation, agreed and elected to procure some medicine in a way that did not draw British attention. Edward, remembering the storm that sunk the Spanish Treasure Fleet, suggested searching the wrecks for any medicine that might have survived; Thatch agreed.
Edward purchased a diving bell and met with Thatch at the site of the sinking; unfortunately for them, the medicine had not survived three years at the bottom of the ocean. Enraged, Thatch left, but was shortly pursued by Edward.
Soon enough, Edward learned that Thatch had attacked a British Man O' War in an attempt to gain some medicine, and was now in trouble. Sailing Jackdaw to his location, Edward managed to relieve Thatch of his predicament. Although the amount of medicine they had procured was pitiful, Edward suggested the travel to Charles-Towne, the town whose stamp adorned the medicinal crates – to retrieve the whole lot.
Siege of Charles-Towne
- Kenway: "What the hell are you doing, man? All of Charles-Towne can see this mess."
- Thatch: "That's the idea. Out of range, but well in sight."
- —Kenway on Thatch at Charles-Towne, 1718.[src]
One month later, the two met near Charles-Towne, where Edward was shocked to see Queen Anne's Revenge brazenly off shore, with hostages aboard. Thatch revealed that he had spent eight days off-shore, waiting for the medicine to be delivered, but that the crew he had sent ashore a week ago to retrieve it had not been heard from since. Edward set out to retrieve the medicine.
After discreetly guiding Jackdaw through the bayou, Edward snuck ashore and forcefully obtained the key to the storeroom holding the medicines. He returned to Queen Anne's Revenge with two crates, as well as the means of making more. Thatch congratulated him, but then revealed he would not be returning to Nassau with him, instead choosing to retire while he still had time to enjoy it.[4]
Blockade of Nassau
Shortly after his return to Nassau, the city was blockaded by the Royal Navy; Woodes Rogers came ashore to publicly announce the general pardon being offered to the pirates, but warned that for the time being they were restricted to the island regardless of their answer. Hornigold and his crew elected to accept the pardon, whilst Vane angrily rebuked it.
Meeting with Vane, Edward decided the time had come to leave Nassau; he proposed using a fireship to ram the British blockade, and went to gather the gunpowder while Vane retrieved the pine pitch.
After retrieving the gunpowder, Edward returned to Vane, who was still in the process of retrieving the pitch. While there, the two overhead that Woodes Rogers association, Commodore Peter Chamberlaine, had decided to ignore the Govenor's orders and was set to destroy the pirate fleet that very night. Realizing that this would scupper their plans, Vane suggested Edward kill the Commodore, before he could order the attack. Edward agreed and made his way to the Commodore's warship, where he shortly made his way aboard and killed the Commodore.
With Chamberlaine dead, the pirates made their move. Launching the fireship at the British fleet, they punched a hole in the blockade and escaped the area, heading for Kenway's base in Great Inagua.[4]
The death of Blackbeard
- "In a world without gold, we might have been heroes!"
- ―Edward Thatch's last word, 1718.[src]
Meeting with Kidd, now revealed to be named Mary Read, Edward stated his intentions to try and bring Thatch back to the West Indies. He then set sail for Ocracoke where Thatch had retired to, in order to make the attempt.
When he arrived, he found Charles Vane angrily giving up on his attempts to bring Thatch back; Edward reluctantly accepted that Thatch had no intention of returning, and instead decided to help him celebrate his retirement. As a parting gift, Thatch informed Edward that he had learned about a man named "Roberts", who was working on a slaver ship called Princess. Edward gratefully accepted the information, but soon spotted a local man acting suspiciously.
Edward followed the man through the outlying jungle until he had met with a British officer; eavesdropping on their conversation, the two discussed Thatch's reputation. Eventually, the British officers reached a clearing overlooking the village and one launched a flare. Within moments, a nearby British fleet bombarded Ocracoke with mortars, destroying the town and many of the ships in the docks. Edward hurriedly made his way back to Jackdaw, where he once again met with Thatch, and the two attempted their escape.
They succeeded in disabling and boarding the attacking Man O' War, but were soon overwhelmed. Thatch was surrounded and decapitated by the British, whilst a shocked Edward, who had tried and failed to fight his way to Thatch's aid, was thrown overboard. Edward returned to Jackdaw and eventually fought his way free.[4]
The pursuit continues
Edward returned to Great Inagua and, disheartened, informed Vane of Thatch's death. Soon enough however, a decision was made to pursue the Princess and learn the location of the Observatory. As such, both Edward and Vane traveled south, in search of a slaver ship.
Once that had located one, both the Ranger and Jackdaw launch their attack, quickly overcoming the vessel and capturing its captain. They learned that the Princess regularly sailed out of Kingston, but within moments found themselves surrounded by Jack Rackham and the rest of Vane's mutinying crew.
The two were marooned on the island of Isla Providencia, where after a few months, Vane grew distrustful and nonsensical – blaming Edward for all their troubles – and threatening to kill him. Vane fled, and Edward gave pursuit before being surprised by a stack of muskets and grenades Vane had happened upon. Sneaking through the ruins, Edward managed to get behind Vane and disarmed him, before leaving him alone on the island. Upon his return to shore, Edward took advantage of the timely arrival of a fishing schooner and single-handedly high jacked the ship. He returned to Great Inagua to find Mary Read and Adéwalé waiting, an incarcerated Rackham in tow and the Jackdaw safely docked.
Edward returned to his pursuit of Roberts, and with Adéwalé's help, learned that the Princess was due in Kingston soon, and that Governor Torres was in the city, with Benjamin Hornigold in attendance. Pursing the Templar Grand Master, Edward learned that Hornigold had sent one of his ships to Príncipe, where Roberts had last been seen, in order to retrieve Roberts. Before he could leave however, Hornigold identified the Jackdaw, and deduced that Edward had been following them. Not wanting to waste time, Edward escaped those soldiers who engaged him and, upon his return to Jackdaw set course for Africa. Months later, they arrived in Príncipe to find the crew of the Princess dead or captured by Hornigold's Templar associates – Josiah Burgess and John Cockram – and Roberts hiding. Edward and Roberts made a deal; Edward would kill the Templars and free the crew of the Princess in return for Roberts' leading him to the Observatory. Edward agreed and proceeded to complete his end of the bargain.
Taking possession of the Man O' War Royal Fortune, Bartholomew Roberts named himself captain and arranged to meet with Edward near the Observatory, back in the West Indies.[4]
The Observatory
In 1719, Edward met with Roberts off the coast of the Yucatán Peninsula, but soon discovered he had been followed by Hornigold. Edward gave chase and disabled Hornigold's ship, forcing it to beach on a nearby island. Going ashore, Edward managed to evade Hornigold's crew and several British sailors, sneaking behind his old friend before assassinating him. The two held a brief, angry exchange as to the nature of Hornigold's betrayal, before he succumbed to his wounds. Edward then returned to Roberts at Cape Long and together, the two traveled inland toward the Observatory.
After incapacitating the local Guardians, Edward and Roberts entered the complex.
Inside, Roberts explained that everything contained therein – the blood of thousands of Precursors – was materially worthless to anybody. Further, he went on to explain the true nature of the Observatory; with a sample of the target's blood kept in a crystal cube, the Observatory was able to project what the target was seeing in real-time. To explain, he inserted a vial containing the blood of Jack Rackham, who was currently overhearing "James Kidd" attempting to recruit Anne Bonny into the life of a pirate, and then the cube of Woodes Rogers, who was discussing the Observatory with Torres.
Edward quickly realized the true reason for the Templars' interest in the Observatory; with just the tiniest amount of blood from each member of the British, Spanish and French governments, the Templars would be able to spy, black mail and effectively rule these Imperial governments from behind a veil.
Edward immediately resolved to keep the Observatory from the Templars, but before he could take any action, he was struck by Roberts and sealed within the facility. Eventually, however, the young pirate managed to locate a passé out of the complex, but in his escape impaled himself on a sharpened branch. Regardless, Edward stumbled toward Roberts, but was too weak to defend himself. An amused Roberts then decided to take advantage of the large bounty on Kenway's head, and turned him over to the British.[4]
Imprisonment
In 1721, after months of imprisonment, Edward was made to witness the sentencing of Anne Bonny and Mary Read for the crimes of piracy, though the two managed to stave their execution by announcing themselves pregnant.
Edward was approached by Torres and Rogers, who offered him his freedom in exchange for the location of the Observatory, though they warned him that they could only stay his eventual execution for so long. Edward was then returned to a gibbet.
That night, Edward was freed by Ah Tabai, who had traveled to Port Royal in order to free Mary and Anne; he offered to ensure Edward's safe passage from the prison should he aid in the rescue – an offer Edward readily accepted.
Edward infiltrated the prison and, after a brief visit to both John Rackham's gibbeted body, and a delirious Charles Vane in a prison cell, succeeded in freeing the two pirates. Unfortunately for them however, Mary had been taken by fever as a result of losing her child, and did not manage to survive the escape. Edward eventually handed her body over to Ah Tabai, who stated that whilst he still had not earned them, Assassin robes he had taken from Duncan many years before suited him, and handed them to him before departing with the pregnant Bonny.
After this, Edward fell into a deep state of despair, drinking heavily, eventually passing out and hallucinating. In his hallucinations, Edward was beset by apparitions of Woodes Rogers, Roberts, Mary and Caroline, among others. The former two taunted him and mocked him, and the latter two attacked his lust for gold and personal glory and lack of concern for anything else. Eventually, he found himself near the Kingston docks, heavily hungover. Standing over him was Adéwalé, who returned the Jackdaw to his care, resigned as his quartermaster and urged him to travel to Tulum, where he promised to explain.[4]
Joining the Assassins
Return to Tulum
When Edward arrived at Tulum, Adéwalé confirmed his resignation as his quartermaster, stating his distaste for working with a man so obsessed with his own gain, and that he felt the Assassins a more worthy cause, which Edward agreed with, reflecting that despite his wealth, he had lost everyone he cared about in its pursuit. He then appealed to Ah Tabai to help him make amends for his past misdeeds, as per Mary's final request.
After a brief conversation between the two on Edward's perspective on the Order, Tulum was once again beset by Spanish Templars. Despite Ah Tabai's reservations, he realized that Mary had seen something in Edward, and so chose place his trust in Edward. Handing the aspiring Assassin a set of Sheng Biao, Ah Tabai and Edward worked together to clear the jungle of Spanish troops, before Edward snuck aboard their Galleon and assassinated the captain.
With the attack repelled, Edward, Adéwalé and Ah Tabai discussed their next move; the removal of the Templars – Torres and Rogers – and the Sage: Bartholomew Roberts.[4]
Three targets
Travelling to Kingston, Edward and his new Quartermaster – Anne Bonny, who had taken the task for want of purpose after the death of her child – visited the Bureau leader, an Assassin named Antó to inquire about Woodes Rogers. Antó suggested that Edward infiltrate the party Rogers was hosting in the guise of an Italian diplomat, so as to get close. Edward agreed and soon enough obtained the disguise he needed.
Sufficiently disguised, Edward entered the party and, as Rogers passed, struck him with his Hidden Blade. Before he left, Edward pried from Rogers the location of Bartholomew Robert: Príncipe.
Once more, Edward traveled to Africa in pursuit of Roberts, sneaking through the very same stronghold that had held his target captive years before. He was soon spotted however, and Roberts attempted to flee aboard the Royal Fortune, but the ship was soon disabled by Jackdaw and boarded. On board, Bartholomew Roberts and Edward Kenway – the last of the pirate captains – fought one another, with Edward emerging the eventual victor, having impaled Roberts with his Sheng Biao. Remorsefully, Roberts remarked that perhaps Edward was indeed the one she had sought, and that he wished he had only had time to open the door to the Temple. He then died, after requesting that Edward destroy his body to prevent the Templars acquiring it, before Edward could gain any more answers.
With Roberts dead, and the Crystal Skull that powered the Observatory in-hand, Edward made the return journey to Havana, in order to confront and assassinate Laureano de Torres y Ayala.
Arriving in Havana, finding the city in lockdown as Torres had anticipated Edward's coming and with a drop of Torres' blood, Edward tracked the Grand Master through the city to a fort in the north. Edward infiltrated the fort, made his way to Torres and moved in for the kill, only to find the man he'd slain was a double wearing Torres's clothes. He was then set upon by El Tiburón, Torres right-hand man and bodyguard, whose blood had resided in the vial under Torres' name.
After a prolonged fight, Edward succeeded in killing El Tiburón and escaped the fort, having deduced that Torres was already on his way to the Observatory, oblivious to the fact that Edward held what he sought.[4]
Death of a Grand Master
Returning to the Observatory once more, the Jackdaw fought its way past the Grand Master's escort and its captain went ashore.
Edward, with the assistance of Bonny, again made his way through the jungle, eliminating the Grand Master's soldiers and freeing those Guardians that had been captured, before entering the Observatory. Inside, he was set upon by the Templars, but made full use of the complexes defenses – which had activated in responses to the Crystal Skull's removal – to fight his way through them.
Climbing his way through the facilities ever changing and disjointed architecture, Edward managed to reach Torres, and struck him down.
With the Templar Grand Master dead, Edward returned to find Ah Tabai, Adéwalé and Anne Bonny waiting for him; together, they returned the Crystal Skull to its rightful place and vowed to seal the Observatory for good. Ah Tabai then offered to allow Edward to aid in the search for the missing blood vials, which had been removed since Edward's last visit; Edward agreed, although stated that he would return home to mend his relationship with Caroline. Remorsefully, Ah Tabai handed Edward a letter which had arrived from England a week past.
The letter stated that Caroline had died two years past, and revealed to Edward the fact that he had a daughter; Jennifer Scott.[4]
The last pirate
- Jennifer: "Hmm, and what about pirates? Will I see any pirates?"
- Edward: "No, there's not much chance of that, I think."
- Jennifer: "Oh, that's rather sad. I should like to have seen one."
- —Edward and his daughter, on the journey home, 1722.[src]
Edward eventually arranged for Jennifer to be brought from England to Great Inagua, and while he waited allowed the Assassins full use of his manor; an offered gladly accepted by Ah Tabai. Adéwalé revealed that, despite his wounds, Woodes Rogers had survived and returned to England, broke but no less of a threat. Edward vowed to deal with him once he had time. Edward invited Anne to return to London with him, but she refused the offer, also claiming she didn't feel she possessed the conviction to remain with the Assassins. However, Anne did tell Edward that she considered him a good man and felt he could prove himself a good father in time as well.
Shortly thereafter, a brig carrying the young Jennifer Scott arrived in port, and Edward went to meet her.
Later life and death
Edward eventually retired from his life at sea and moved to London, where he met Tessa Stephenson-Oakley, the daughter of the wealthy landowner he rented his house from. Using her family connections, Tessa assisted Edward in purchasing a manor on Queen Anne's Square, London, and by 1725, the two married and had a son, Haytham.
Edward trained Haytham to become an Assassin from an early age, through things such as swordsmanship tutelage, despite Haytham barely being six years old at the time. Edward would also encourage his son to think for himself, and dispute others' opinions. Despite this, Edward kept his past a secret from his young son, though his former career as a pirate forever distanced the family from their neighbors in London.[2]
On 4 December 1733, Edward, Haytham and Jennifer attended a performance of The Beggar's Opera at the Theatre Royal, where they were joined by Edward's aspiring property manager Reginald Birch.[4][5] Following this, the four met with Tessa at White's Chocolate House on Chesterfield Street, to celebrate Haytham's eighth birthday.[2]
Upon the return home, the group were accosted by a mugger. When the mugger attempted to steal Tessa's necklace, he was swiftly repulsed by Edward, before being pounced upon by Reginald Birch. Edward adamantly refused to allow Birch to kill the attempted mugger, and was infuriated at Reginald's harsh vigilantism. When the family returned home that night, Edward asked his son whether he thought that the thief should have been allowed to go free. Haytham replied that he had initially held feelings to enact revenge, but would have offered the man clemency; Edward then presented Haytham with a steel short sword.[2]

Over the next two years, Birch became a regular visitor while courting Jenny's hand in marriage. She eventually discovered he was a Templar, and after informing her father, the two men engaged in a loud argument, concluding with Birch storming out of the office. Regardless, he had what he was looking for: young Haytham had unintentionally revealed the location of Edward's journal, containing his research on the First Civilization, when he told Birch about his sword in a secret compartment in the games room.[2]
On 3 December 1735, the Kenway household was infiltrated by masked men – under the orders of Reginald Birch – who kidnapped his daughter, Jenny, and killed several of the servants. After making sure that his wife and son were safe, Edward raced to the games room and was confronted by two of the intruders; after a prolonged fight, one of the men managed to impale Edward through the chest with their sword, killing him instantly.[2]
Personality and characteristics
- "For Christ's sake, Edward. Don't anything but the stink of riches wrinkle your nose?"
- ―Mary Read, 1718.[src]
During his formative years, Edward was a reckless, albeit brave individual who was infatuated with the idea of fame and glory. Such was his obsession that he left his first wife to become a privateer in the British Navy, hoping to score his fortune in the Caribbean and prove his worth to his estranged wife. After the Treaty of Utrecht effectively made all privateers redundant, many turned to a life of piracy; Edward among them.[4]
As the captain of the Jackdaw he quickly became feared and respected for his skill at the helm of a ship and his combat prowess, with even the renowned Edward Thatch commenting upon his ability. Indeed, by 1722 the bounty on Edward's head was among the largest there had ever been.
It was the promise of wealth, power and infamy that spurred Edward into seeking out the Observatory, at the expense of both the Templars and Assassins. Although the Assassin Mary Read knew him to be good at heart, and capable of change, the Assassins en-large remained suspiscious of him and strongly disagreed with his lifestyle.
Despite the vested interested of both the Assassins and the Templars in the veteran pirate, Edward remained steadfastly focused on his own goals; power, infamy and proof that he was better than he was born to be. Edward was also one to take any advantage afforded him; twisting the meaning of the Assassins' Creed to suit his own ends, before eventually coming to realize that it promised him the power to make himself better than he was.[6]
As a father, Edward encouraged his son to think for himself instead of believing everything his home-school teachers said. He also expressed pride towards his eight-year old son when Haytham said that he would have offered the thief who tried to mug his mother clemency, instead of acting on the impulse to kill him like Birch had attempted to. Edward could be quite conservative in other respects however, such as his decision to marry off his daughter to Birch, as was the tradition of the day.[2]
Skills and equipment
During his privateer years, Edward spent his time repeatedly climbing the vast rigging and masts of his warships, providing him with a deftness that equaled that of any Assassin.[6] He was also known to wield at least four flintlock pistols, and for a proficiency in dual-swordsmanship, and would make full use of his armaments in battle.[4]
One of Edward's most invaluable pieces of equipment was his ship, Jackdaw. She was equipped with a diving bell that Edward used to dive for treasure beneath the waves; during these maritime explorations, Edward proved to be a strong swimmer who was capable of fending off hostile sea creatures such as sharks if he was attacked.[7]
Trivia
- Edward can be translated as "rich guard", as it is derived from the Old English elements ead "rich, blessed" and weard "guard".
- Kenway comes from an Old English name, either Cynewig or Cenwig, composed of the words cyne ("royal") or cen ("keen, bold") and wig ("war").
- Edward was the first member of the Kenway family to join the Assassins.[8]
- During his time trapped in an induced alternate reality, Ratonhnhaké:ton remarked that he seemed to have inherited his taste for maritime adventures from his grandfather, Edward.[9]
- Unlike many known Assassins, Edward's outfit did not possess a beaked hood.
- In Assassin's Creed: Forsaken, Edward is described as having dark hair, though he has been shown to have blonde hair in Assassin's Creed IV: Black Flag.
- Edward has been shown to bear multiple facial scars: one through his right eyebrow and the corner of his eye, another across the bridge of his nose, and a third from his right ear through his cheek.
- Edward's Hidden Blades possessed Assassin insignia engraved on the mechanism, while the right blade also showed a small skull below the insignia, referencing the fact he was both a pirate and an Assassin.
- Voice actor/motion capture provider Matt Ryan initially chose to portray Edward with a Mancunian accent during casting call. However, after the developers heard Ryan's natural Welsh accent they asked him to voice Kenway instead with a South-Welsh English accent. They then chose to rewrite Kenway's backstory to fit Ryan's accent.[10][11]
Gallery
-
 Edward aboard Jackdaw as a whale breaches the water ahead
 -
 Edward searching an underwater shipwreck for treasure
 -
 Edward wielding his dual cutlasses
 -
 Edward gazing at nearby Mayan ruins, occupied by enemies
 -
 Edward freerunning through the jungle
 -
 Edward in combat, wielding dual pistols
 -
 Edward shooting a soldier through his knee
 -
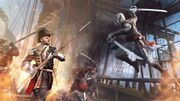 Edward boarding an enemy vessel
 -
 Edward taking a Leap of Faith
 -
 Edward alongside Blackbeard
 -
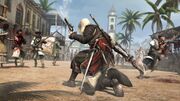
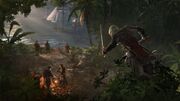
 Edward assassinating a British soldier in the jungle
 -
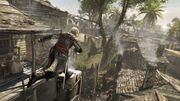
 Edward walking ashore from the Jackdaw, with a British soldier's corpse nearby
 -
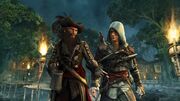
 Edward conversing with Adéwalé while a party ensues nearby
 -
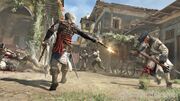
 Edward emerging from the jungle to assassinate a group of British soldiers
 -
 Edward firing his pistol from a close distance
 -
 Edward shooting a soldier after stabbing him with his cutlass
 -
 Concept art of Edward Kenway
 -

-
 Early concept art of Edward
 -
More concept art of Edward between two other pirates
-
 Rendition of Edward, with his ship, the Jackdaw, behind him
 -
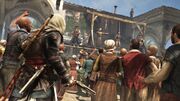
 Edward and other pirates
 -
 Edward attending a public hanging
 -
 Edward chasing a sea-shanty page
 -
 Edward poisoning a guard
 -

-

-


References
- ↑ Assassin's Creed: The Watch
- ↑ 2.0 2.1 2.2 2.3 2.4 2.5 2.6 Assassin's Creed: Forsaken
- ↑ Assassin's Creed: Initiates
- ↑ 4.00 4.01 4.02 4.03 4.04 4.05 4.06 4.07 4.08 4.09 4.10 4.11 4.12 4.13 4.14 4.15 4.16 4.17 Assassin's Creed IV: Black Flag
- ↑ Assassin's Creed III
- ↑ 6.0 6.1 'Edward Kenway - Portrait of a Pirate Assassin'
- ↑ Assassin's Creed IV: Black Flag gameplay reveal trailer
- ↑ Official Assassin's Creed IV: Black Flag Q&A
- ↑ The Tyranny of King Washington: The Redemption
- ↑ GamesRadar: Creating Edward Kenway in Assassin's Creed 4: Black Flag
- ↑ WalesOnline Pirate Hero: New Assassin's Creed