Blood vial: Difference between revisions
imported>Soranin Not canon |
imported>Gener4l Cl4ank4 No edit summary |
||
| Line 6: | Line 6: | ||
The cubes comprised of two parts, the larger container and the lid, made by way of a planar slice through one corner so that it resembled a "whole edge" {{Wiki|vertex figure}}. The lid could not fully detach, but instead was fixed by magnets to slide up and down along a path. The absolute center of the cube had microscopic spikes that punctured skin, drew blood, and then held the sample in place.<ref>Blood vial mechanics concept art in Gallery</ref> | The cubes comprised of two parts, the larger container and the lid, made by way of a planar slice through one corner so that it resembled a "whole edge" {{Wiki|vertex figure}}. The lid could not fully detach, but instead was fixed by magnets to slide up and down along a path. The absolute center of the cube had microscopic spikes that punctured skin, drew blood, and then held the sample in place.<ref>Blood vial mechanics concept art in Gallery</ref> | ||
Once a blood sample was collected, the cube was placed inside the [[Crystal Skulls|Crystal Skull]] that powered the Observatory, which would then project what the donor saw and heard in real time.<ref name="The Observatory">''[[Assassin's Creed IV: Black Flag]]'' – [[The Observatory]]</ref> It was for this reason that the [[Templars]] first during the [[Golden Age of Piracy]]<ref name="MisterWalpole">''Assassin's Creed IV: Black Flag'' – [[Mister Walpole, I Presume?]]</ref> and centuries later in the [[Modern times|present]] sought the Observatory,<ref name="Modern">''Assassin's Creed IV: Black Flag'' – [[21st century conversations|Modern day]]</ref> hoping that they might make use of its surveillance abilities to spy on and blackmail numerous government officials.<ref name="MisterWalpole"/><ref name="Modern"/> | Once a blood sample was collected, the cube was placed inside the [[Crystal Skulls|Crystal Skull]] that powered the Observatory, which would then project what the donor saw and heard in real time.<ref name="The Observatory">''[[Assassin's Creed IV: Black Flag]]'' – [[The Observatory]]</ref> It was for this reason that the [[Templars]] first during the [[Golden Age of Piracy]]<ref name="MisterWalpole">''[[Assassin's Creed IV: Black Flag]]'' – [[Mister Walpole, I Presume?]]</ref> and centuries later in the [[Modern times|present]] sought the Observatory,<ref name="Modern">''[[Assassin's Creed IV: Black Flag]]'' – [[21st century conversations|Modern day]]</ref> hoping that they might make use of its surveillance abilities to spy on and blackmail numerous government officials.<ref name="MisterWalpole"/><ref name="Modern"/> | ||
==History== | ==History== | ||
| Line 13: | Line 13: | ||
===Golden Age of Piracy=== | ===Golden Age of Piracy=== | ||
Around April 1673,<ref>''Assassin's Creed IV: Black Flag'' – [[Thom Kavanagh's letters]] #12: "The Templar Arrives"</ref> the carpenter and [[Sage]] [[Thomas Kavanagh, Jr.]] set sail from [[Tulum]]<ref>''Assassin's Creed IV: Black Flag'' – Thom Kavanagh's letters #17: Taking my Leave</ref> after spending a week<ref name="ThomLetter16">''Assassin's Creed IV: Black Flag'' – Thom Kavanagh's letters #16: "The Observatorie"</ref> with the [[West Indies Brotherhood of Assassins|West Indies Assassins]]' [[Mentor]] [[Bahlam]], who explained Thom's nature as a Sage,<ref name="ThomLetter15">''Assassin's Creed IV: Black Flag'' – Thom Kavanagh's letters #15: "Reste and Repaste"</ref> the visions that plagued him, and their connection to the Observatory.<ref name="ThomLetter16"/> After a year of travel, he finally arrived at [[Long Bay]], [[Jamaica]] and reached the Observatory, which he entered to explore and saw the vials along its main hallway.<ref>''Assassin's Creed IV: Black Flag'' – Thom Kavanagh's letters #18: "My Searche"</ref> Thom stayed in the main chamber with the Observatory's {{Wiki|armillary sphere}} and vial collection for a week, during which time he learned all he could about [[Aita]]'s conflicting identity inside his head.<ref>''Assassin's Creed IV: Black Flag'' – Thom Kavanagh's letters #19: "On Being A "Sage""</ref> | Around April 1673,<ref>''[[Assassin's Creed IV: Black Flag]]'' – [[Thom Kavanagh's letters]] #12: "The Templar Arrives"</ref> the carpenter and [[Sage]] [[Thomas Kavanagh, Jr.]] set sail from [[Tulum]]<ref>''[[Assassin's Creed IV: Black Flag]]'' – Thom Kavanagh's letters #17: Taking my Leave</ref> after spending a week<ref name="ThomLetter16">''[[Assassin's Creed IV: Black Flag]]'' – Thom Kavanagh's letters #16: "The Observatorie"</ref> with the [[West Indies Brotherhood of Assassins|West Indies Assassins]]' [[Mentor]] [[Bahlam]], who explained Thom's nature as a Sage,<ref name="ThomLetter15">''[[Assassin's Creed IV: Black Flag]]'' – Thom Kavanagh's letters #15: "Reste and Repaste"</ref> the visions that plagued him, and their connection to the Observatory.<ref name="ThomLetter16"/> After a year of travel, he finally arrived at [[Long Bay]], [[Jamaica]] and reached the Observatory, which he entered to explore and saw the vials along its main hallway.<ref>''[[Assassin's Creed IV: Black Flag]]'' – Thom Kavanagh's letters #18: "My Searche"</ref> Thom stayed in the main chamber with the Observatory's {{Wiki|armillary sphere}} and vial collection for a week, during which time he learned all he could about [[Aita]]'s conflicting identity inside his head.<ref>''[[Assassin's Creed IV: Black Flag]]'' – Thom Kavanagh's letters #19: "On Being A "Sage""</ref> | ||
Decades later in 1714, the [[British Brotherhood of Assassins|British Assassin]] [[Duncan Walpole]] decided to betray his comrades and join the [[West Indies Rite of the Templar Order|West Indies Templars]], dissatisfied at being passed over for promotion both [[Assassin rank|within the Assassins]] and at his job in the [[East India Company]].<ref>''[[Assassin's Creed: The Official Movie Novelization]]'' – Regressions: Nathan</ref> Upon arriving in the [[Caribbean]] in 1715<ref name="EdwardMemory">''Assassin's Creed IV: Black Flag'' – [[Edward Kenway (memory)]]</ref> on an assignment to train under the new local Mentor [[Ah Tabai]],<ref>''Assassin's Creed IV: Black Flag'' – [[Nothing Is True...]]</ref> Walpole wrote to the Templars' [[Grand Master of the Templar Order|Grand Master]] [[Laureano de Torres y Ayala]] offering to meet in [[Havana]] and deliver "the information [they] desire" as proof of his new allegiance | Decades later in 1714, the [[British Brotherhood of Assassins|British Assassin]] [[Duncan Walpole]] decided to betray his comrades and join the [[West Indies Rite of the Templar Order|West Indies Templars]], dissatisfied at being passed over for promotion both [[Assassin rank|within the Assassins]] and at his job in the [[East India Company]].<ref>''[[Assassin's Creed: The Official Movie Novelization]]'' – Regressions: Nathan</ref> Upon arriving in the [[Caribbean]] in 1715<ref name="EdwardMemory">''[[Assassin's Creed IV: Black Flag]]'' – [[Edward Kenway (memory)|Edward Kenway]]</ref> on an assignment to train under the new local Mentor [[Ah Tabai]],<ref>''[[Assassin's Creed IV: Black Flag]]'' – [[Nothing Is True...]]</ref> Walpole wrote to the Templars' [[Grand Master of the Templar Order|Grand Master]] [[Laureano de Torres y Ayala]] offering to meet in [[Havana]] and deliver "the information [they] desire" as proof of his new allegiance;<ref name="EdwardMemory"/> namely, an empty blood vial<ref>''[[Assassin's Creed IV: Black Flag]]'' – [[...And My Sugar?]]</ref> and maps of Assassin camps in the surrounding areas.<ref>''[[Assassin's Creed IV: Black Flag]]'' – [[This Old Cove]]</ref> | ||
Duncan boarded the [[Royal Navy]] [[frigate]] [[HMS Intrigue|HMS ''Intrigue'']] heading to Havana, but he never reached his destination. In June 1715, the [[ship]] met the [[Piracy|pirate]] [[brig]] ''[[Jacobite]]'' off the coast of [[Cape Bonavista]] and attacked it. In the skirmish, the ''Intrigue'' sank, but not before setting the ''Jacobite''{{'}}s [[gunpowder]] alight with a [[cannon]] volley, blowing both ships to splinters and washing a wounded Duncan ashore with his belongings and the ''Jacobite''{{'}}s only survivor, [[Edward Kenway]]. When Edward tried to haggle a price for helping Duncan reach Havana, he fled into the jungle, initiating a chase that ended when Edward killed Duncan, looted the cube and maps in his bag, and assumed his identity to claim the rewards himself, unaware of their wider importance.<ref name="EdwardMemory"/> | Duncan boarded the [[Royal Navy]] [[frigate]] [[HMS Intrigue|HMS ''Intrigue'']] heading to Havana, but he never reached his destination. In June 1715, the [[ship]] met the [[Piracy|pirate]] [[brig]] ''[[Jacobite]]'' off the coast of [[Cape Bonavista]] and attacked it. In the skirmish, the ''Intrigue'' sank, but not before setting the ''Jacobite''{{'}}s [[gunpowder]] alight with a [[cannon]] volley, blowing both ships to splinters and washing a wounded Duncan ashore with his belongings and the ''Jacobite''{{'}}s only survivor, [[Edward Kenway]]. When Edward tried to haggle a price for helping Duncan reach Havana, he fled into the jungle, initiating a chase that ended when Edward killed Duncan, looted the cube and maps in his bag, and assumed his identity to claim the rewards himself, unaware of their wider importance.<ref name="EdwardMemory"/> | ||
Edward reached Havana in early July,<ref name="LivelyHavana">''Assassin's Creed IV: Black Flag'' – [[Lively Havana]]</ref> only to immediately lose the blood vial and maps when [[soldier]]s from the occupying [[Spanish Empire|Spaniards]] seized "his" effects<ref name="AndMySugar">''Assassin's Creed IV: Black Flag'' – [[...And My Sugar?]]</ref> once he escaped a [[Tavern|bar]] brawl,<ref name="LivelyHavana"/> though he quickly infiltrated the nearby [[Castillo de San Salvador de la Punta]] and recovered the objects<ref name="AndMySugar"/> which he promptly delivered to | [[File:Mister Walpole I Presume 7.png|thumb|250px|Laureano Torres holding a blood vial]] | ||
Edward reached Havana in early July,<ref name="LivelyHavana">''[[Assassin's Creed IV: Black Flag]]'' – [[Lively Havana]]</ref> only to immediately lose the blood vial and maps when [[soldier]]s from the occupying [[Spanish Empire|Spaniards]] seized "his" effects<ref name="AndMySugar">''[[Assassin's Creed IV: Black Flag]]'' – [[...And My Sugar?]]</ref> once he escaped a [[Tavern|bar]] brawl,<ref name="LivelyHavana"/> though he quickly infiltrated the nearby [[Castillo de San Salvador de la Punta]] and recovered the objects<ref name="AndMySugar"/> which he promptly delivered to Torres and the other Templars.<ref name="MisterWalpole"/> | |||
In September 1719, the new Sage [[Bartholomew Roberts]] interrogated a sailor from the [[Portuguese Navy]] and learned that they had acquired a large [[Treasure chest|chest]] of vials with active blood samples. Wanting the vials himself, he convinced Edward to sail the ''[[Jackdaw]]'' into the heart of the navy under a false flag, capture the [[Man O' War]] flagship ''[[Royal Fortune|Nosso Senhor da Compreensão]]'' that held the vials, and escape with both prizes. Although the Portuguese caught onto the ruse, it was too late to stop Edward and | In September 1719, the new Sage [[Bartholomew Roberts]] interrogated a sailor from the [[Portuguese Navy]] and learned that they had acquired a large [[Treasure chest|chest]] of vials with active blood samples. Wanting the vials himself, he convinced Edward to sail the ''[[Jackdaw]]'' into the heart of the navy under a false flag, capture the [[Man O' War]] flagship ''[[Royal Fortune|Nosso Senhor da Compreensão]]'' that held the vials, and escape with both prizes. Although the Portuguese caught onto the ruse, it was too late to stop Edward and Roberts, who sank their pursuers and made off with two chests of vials.<ref name="BlackBartsGambit">''[[Assassin's Creed IV: Black Flag]]'' – [[Black Bart's Gambit]]</ref> | ||
One of the recovered chests was full of empty cubes, but the other had many active blood samples, including those of the Templars themselves; spcifically, the late [[Slavery|slaver]] [[Laurens Prins]], the [[The Bahamas|Bahaman]] governor [[Woodes Rogers]], the pirate [[Benjamin Hornigold]], and even Grand Master Torres.<ref name="BlackBartsGambit"/> Unbeknownst to Edward at the time, while Torres had taken samples from his fellow Templars to ensure their loyalty, he had never donated a sample of his own blood, instead using that of a decoy and intentionally mislabeling it.<ref>''[[Assassin's Creed IV: Black Flag]]'' – [[Tainted Blood]]</ref> | |||
The recovery mission had a partial success just days later when an Assassin scout identified and tailed a group of survivors from Torres' expedition party who had pocketed some vials. The scout followed one of them to Havana, but instead of reporting his findings to the [[Assassin bureau]], he decided to try and retrieve the vial alone. Weary from his long trip tracking his target, however, the Assassin was quickly overwhelmed by the Templar, who [[poison]]ed him and forced the scout to retreat. The wounded man returned to the bureau, but when he died shortly after, another Assassin was tasked with hunting down the Templar, killing him, and recovering the vial,<ref | [[File:AC4 Observatory Bloodvials.png|left|thumb|250px|Blood vials housed in the Observatory]] | ||
In September 1722, Torres and a host of Templars arrived at the Observatory, intending to claim it for themselves. As a first order of business, Torres ordered that the hundreds of vials with Isu DNA be packed and transported to an undisclosed location. When Edwarf tracked Torres to the Observatory and assassinated him, he noted the vials' absence from their wall alcoves, prompting Ah Tabai and the West Indies Assassins to devote their resources to locating the vials.<ref>''[[Assassin's Creed IV: Black Flag]]'' – [[Ever a Splinter]]</ref> | |||
The recovery mission had a partial success just days later when an Assassin scout identified and tailed a group of survivors from Torres' expedition party who had pocketed some vials. The scout followed one of them to Havana, but instead of reporting his findings to the [[Assassin bureau]], he decided to try and retrieve the vial alone. Weary from his long trip tracking his target, however, the Assassin was quickly overwhelmed by the Templar, who [[poison]]ed him and forced the scout to retreat.<ref name="HuntForBlood">''[[Assassin's Creed: Identity]]'' – [[Database: Story Summary - A Hunt for Blood]]</ref> | |||
The wounded man returned to the bureau, but when he died shortly after, another Assassin was tasked with hunting down the Templar, killing him, and recovering the vial,<ref name="HuntForBlood" /> though whether they succeeded was unclear. This instance was the Assassins' sole contact with the vials after their relocation, as the majority of the cubes stayed unaccounted for and were lost to time. | |||
===Modern times=== | ===Modern times=== | ||
In 1868, when [[Evie Frye]] and [[Jayadeep Mir|Henry Green]] infiltrated the [[Kenway Mansion]] looking for clues on the [[Shroud of Eden 2|Shroud of Eden]], they found a blood vial among Edward's possessions,<ref name="ACS">''[[Assassin's Creed: Syndicate]]'' – [[Playing It by Ear]]</ref> which he had either kept as a memento from his pirating days or had recovered sometime during his later years working for the British Assassins. | In 1868, when [[Evie Frye]] and [[Jayadeep Mir|Henry Green]] infiltrated the [[Kenway Mansion]] looking for clues on the [[Shroud of Eden 2|Shroud of Eden]], they found a blood vial among Edward's possessions,<ref name="ACS">''[[Assassin's Creed: Syndicate]]'' – [[Playing It by Ear]]</ref> which he had either kept as a memento from his pirating days or had recovered sometime during his later years working for the British Assassins. | ||
During [[World War I]], a member of the [[Instruments of the First Will]] known only as the "[[Master Spy]]" manipulated the Templars into sending two [[German Army]] spies to pose as a nurse and her aide and collect blood vial samples from a [[British Army]] medical camp in [[London]]. When [[Winston Churchill]] informed the British Assassin [[Lydia Frye]] of this medical malpractice, she assassinated the pair, stopping the Master Spy's plans.<ref>''Assassin's Creed: Syndicate'' – [[The Apothecary Twins]]</ref> | During [[World War I]], a member of the [[Instruments of the First Will]] known only as the "[[Master Spy]]" manipulated the Templars into sending two [[German Army]] spies to pose as a nurse and her aide and collect blood vial samples from a [[British Army]] medical camp in [[London]]. When [[Winston Churchill]] informed the British Assassin [[Lydia Frye]] of this medical malpractice, she assassinated the pair, stopping the Master Spy's plans.<ref>''[[Assassin's Creed: Syndicate]]'' – [[The Apothecary Twins]]</ref> | ||
By the 1980s, [[Abstergo Industries]] had taken great interest in securing more vials and had found dozens since then. Of all of those recovered, only three vials had the DNA inside fully intact, and only one of the three contained Isu blood. In 2013, Abstergo described them in an internal memo, along with other Isu artifacts.<ref>''Assassin's Creed IV: Black Flag'' – [[Noob's personal files]]: "Crypto–History: Artifacts"</ref><ref>''Assassin's Creed: Identity'' – [[Database: Blood Vials]]</ref> On 2 November of that year, an [[Initiates|Initiate]] spy escaped [[Abstergo Entertainment]] with one of the vials.<ref> ''[[Assassin's Creed: Initiates]]'' – [[Surveillance]]: "Blood Screen"</ref> | By the 1980s, [[Abstergo Industries]] had taken great interest in securing more vials and had found dozens since then. Of all of those recovered, only three vials had the DNA inside fully intact, and only one of the three contained Isu blood. In 2013, Abstergo described them in an internal memo, along with other Isu artifacts.<ref>''[[Assassin's Creed IV: Black Flag]]'' – [[Noob's personal files]]: "Crypto–History: Artifacts"</ref><ref>''[[Assassin's Creed: Identity]]'' – [[Database: Blood Vials]]</ref> On 2 November of that year, an [[Initiates|Initiate]] spy escaped [[Abstergo Entertainment]] with one of the vials.<ref> ''[[Assassin's Creed: Initiates]]'' – [[Surveillance]]: "Blood Screen"</ref> | ||
On 16 December in Abstergo's [[Abstergo Philadelphia Facility|facility]] in [[Philadelphia, United States|Philadelphia]], nurse [[Deanna Geary]] from the [[Lineage Discovery and Acquisition]] department performed a medical check up on the company's new employee, [[Milton Jones]]. As Geary took a sample of Jones' blood in a vial, she told him it was standard policy for company health records. She was unaware that her supervising doctor [[Damian Saravakos]] was a Templar and had analyzed the sample himself, then reported to the department director and [[Inner Sanctum of the Templar Order|Inner Sanctum]] member [[Mitsuko Nakamura]] that Jones was subject of interest given his descent from Edward's quartermaster [[Adéwalé]].<ref>''Assassin's Creed: Initiates'' – Surveillance: "The Look of Love"</ref> | On 16 December, in Abstergo's [[Abstergo Philadelphia Facility|facility]] in [[Philadelphia, United States|Philadelphia]], nurse [[Deanna Geary]] from the [[Lineage Discovery and Acquisition]] department performed a medical check up on the company's new employee, [[Milton Jones]]. As Geary took a sample of Jones' blood in a vial, she told him it was standard policy for company health records. She was unaware that her supervising doctor [[Damian Saravakos]] was a Templar and had analyzed the sample himself, then reported to the department director and [[Inner Sanctum of the Templar Order|Inner Sanctum]] member [[Mitsuko Nakamura]] that Jones was subject of interest given his descent from Edward's quartermaster [[Adéwalé]].<ref>''[[Assassin's Creed: Initiates]]'' – Surveillance: "The Look of Love"</ref> | ||
By 2014, Abstergo had recovered | By 2014, Abstergo had recovered several more blood vials and gave the samples to Dr. [[Álvaro Gramática]] to study from his [[Abstergo Industries Paris facility|facility]] in [[Paris]], but the vials were destroyed in an Assassin attack by [[Shaun Hastings]] and the [[Russian Brotherhood of Assassins|Russian Assassin]] [[Galina Voronina]].<ref>''[[Assassin's Creed: Syndicate]]'' – [[Database: Reconstructed Data 007]]</ref> | ||
==Behind the scenes== | ==Behind the scenes== | ||
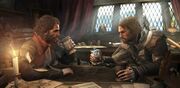
In the E3 2013 trailer for ''[[Assassin's Creed IV: Black Flag]]'', Edward sails the ''Jackdaw'' into combat with a Templar ship, boards the enemy vessel, and kills the Templar commanding it. While he inspects a looted blood vial at night, he is watched from afar by an unnamed Woodes Rogers aboard his ship ''Delicia'', which was historically documented to have participated in the {{Wiki|Raid on Nassau (1720)|raid on Nassau}} in 1720. However, neither Woodes or Edward have such scenes in-game or express knowledge of what they saw, nor does Woodes' ship ever appear. In similar fashion, a promotional image has Edward holding a vial and discussing it over [[beer]] in the [[captain]]'s cabin with [[Charles Vane]], even though he never confided such knowledge to Vane in ''Black Flag''. | In the E3 2013 trailer for ''[[Assassin's Creed IV: Black Flag]]'', Edward sails the ''Jackdaw'' into combat with a Templar ship, boards the enemy vessel, and kills the Templar commanding it. While he inspects a looted blood vial at night, he is watched from afar by an unnamed Woodes Rogers aboard his ship ''Delicia'', which was historically documented to have participated in the {{Wiki|Raid on Nassau (1720)|raid on Nassau}} in 1720. However, neither Woodes or Edward have such scenes in-game or express knowledge of what they saw, nor does Woodes' ship ever appear. In similar fashion, a promotional image has Edward holding a vial and discussing it over [[beer]] in the [[captain]]'s cabin with [[Charles Vane]], even though he never confided such knowledge to Vane in ''Black Flag''. | ||
[[File:AC4 Blood Vial prop 1.png|thumb|250px|A blood vial prop and its box]] | |||
In 2013, [[Ubiworkshop]] sold a limited run of blood vial props for $59.99 USD as part of a promotion for the ''Assassin's Creed: Initiates'' site. The acrylic cubes measured 2 cubic inches (5 cubic centimeters) and came with a stand and a box cover with the Abstergo Industries logo. The first 500 units sold came with an ''Initiates'' code<ref name="Ubiworkshop">{{Cite web|url=http://store.ubi.com/us/assassin-s-creed---the-vial/577bd692a3be1616208b4f2e.html|title=Assassin's Creed – The Vial|archiveurl=https://web.archive.org/web/20161005061120/https://store.ubi.com:80/us/assassin-s-creed---the-vial/577bd692a3be1616208b4f2e.html|archivedate=5 October 2016|author=Ubisoft|date=2013|publisher=''Ubisoft''|accessdate=8 September 2022}}</ref> that was etched low enough on one of its faces to be obscured by the stand's lip, and a coded letter written in hexadecimal.<ref>{{Youtube|xAYDlLJdtks|Ubiworkshop - The Vial: Unboxing (Initiates Edition)|channel/UCJagPhYpiiE09D5pA-ZGuZw|Access The Animus}}</ref> The code unlocked an ''Initiates'' "database" entry for it, a [[Assassin's Creed: Initiates avatars|special avatar]] of Bartholomew Roberts for users, and an exclusive side quest.<ref>Database image in Gallery</ref> | In 2013, [[Ubiworkshop]] sold a limited run of blood vial props for $59.99 USD as part of a promotion for the ''Assassin's Creed: Initiates'' site. The acrylic cubes measured 2 cubic inches (5 cubic centimeters) and came with a stand and a box cover with the Abstergo Industries logo. The first 500 units sold came with an ''Initiates'' code<ref name="Ubiworkshop">{{Cite web|url=http://store.ubi.com/us/assassin-s-creed---the-vial/577bd692a3be1616208b4f2e.html|title=Assassin's Creed – The Vial|archiveurl=https://web.archive.org/web/20161005061120/https://store.ubi.com:80/us/assassin-s-creed---the-vial/577bd692a3be1616208b4f2e.html|archivedate=5 October 2016|author=Ubisoft|date=2013|publisher=''Ubisoft''|accessdate=8 September 2022}}</ref> that was etched low enough on one of its faces to be obscured by the stand's lip, and a coded letter written in hexadecimal.<ref>{{Youtube|xAYDlLJdtks|Ubiworkshop - The Vial: Unboxing (Initiates Edition)|channel/UCJagPhYpiiE09D5pA-ZGuZw|Access The Animus}}</ref> The code unlocked an ''Initiates'' "database" entry for it, a [[Assassin's Creed: Initiates avatars|special avatar]] of Bartholomew Roberts for users, and an exclusive side quest.<ref>Database image in Gallery</ref> | ||
In the game files for ''[[Assassin's Creed: Identity]]'', there is a database entry which mentions a blood vial, though it does not appear in the game itself. The following paragraph details | In the game files for ''[[Assassin's Creed: Identity]]'', there is a database entry which mentions a blood vial, though it does not appear in the game itself. The following paragraph details this entry. | ||
:Sometime in 1499, [[Caterina Sforza]] visited [[Monteriggioni]] and told the [[Italian Brotherhood of Assassins|Italian Assassin]] [[Ezio Auditore da Firenze|Ezio Auditore]] about a secret room her late husband [[Girolamo Riario]] had beneath the [[Rocca di Ravaldino]] in the city of [[Forlì]], where he kept various treasures for his [[Roman Rite of the Templar Order|Italian Templar]] brethren. Believing the chamber would hold important information as well, Ezio asked fellow Assassin [[Lo Sparviero]] to try and find a man named [[Andrea Migli]], Girolamo's left hand and the only man with any knowledge of the vault's location but whom Caterina suspected was already dead.<ref name="NiccoloJournal">''[[Assassin's Creed: Identity]]'' – [[Niccolò Machiavelli's journal]] #11: "The Fallen Ruler"</ref> Lo Sparviero tried to search for Andrea, but in the process learned of a key-medallion that could open the chamber. Once Ezio acquired it, he used it to enter the secret room to investigate. He later returned empty-handed and informed [[Niccolò Machiavelli]] that the buried chamber held many undisclosed secrets, among which was "a cube with a red substance inside". Although Ezio did not recognize what it was nor did he ever realize its importance, he sent the cube to his polymath ally [[Leonardo da Vinci]], but never heard back from the inventor,<ref name="NiccoloJournal"/> who by then was captured and forcibly employed by [[Cesare Borgia]] to make [[War Machine|war machines]].<ref>''[[Assassin's Creed: Brotherhood]]'' – [[An Unexpected Visitor]]</ref> | :Sometime in 1499, [[Caterina Sforza]] visited [[Monteriggioni]] and told the [[Italian Brotherhood of Assassins|Italian Assassin]] [[Ezio Auditore da Firenze|Ezio Auditore]] about a secret room her late husband [[Girolamo Riario]] had beneath the [[Rocca di Ravaldino]] in the city of [[Forlì]], where he kept various treasures for his [[Roman Rite of the Templar Order|Italian Templar]] brethren. Believing the chamber would hold important information as well, Ezio asked fellow Assassin [[Lo Sparviero]] to try and find a man named [[Andrea Migli]], Girolamo's left hand and the only man with any knowledge of the vault's location but whom Caterina suspected was already dead.<ref name="NiccoloJournal">''[[Assassin's Creed: Identity]]'' – [[Niccolò Machiavelli's journal]] #11: "The Fallen Ruler"</ref> Lo Sparviero tried to search for Andrea, but in the process learned of a key-medallion that could open the chamber. Once Ezio acquired it, he used it to enter the secret room to investigate. He later returned empty-handed and informed [[Niccolò Machiavelli]] that the buried chamber held many undisclosed secrets, among which was "a cube with a red substance inside". Although Ezio did not recognize what it was nor did he ever realize its importance, he sent the cube to his polymath ally [[Leonardo da Vinci]], but never heard back from the inventor,<ref name="NiccoloJournal"/> who by then was captured and forcibly employed by [[Cesare Borgia]] to make [[War Machine|war machines]].<ref>''[[Assassin's Creed: Brotherhood]]'' – [[An Unexpected Visitor]]</ref> | ||
In ''[[Assassin's Creed: Rogue]]'', a picture of a blood vial, alongside other Isu artifacts including [[Apples of Eden]], [[Crystal Balls]] and Crystal Skulls, can be seen on a notice board inside the [[Davenport Homestead]].<ref>''[[Assassin's Creed: Rogue]]'' – [[Freewill]]</ref> | |||
==Gallery== | ==Gallery== | ||
<gallery captionalign="center | <gallery captionalign="center" position="center" widths="180"> | ||
Assassin's Creed IV Black Flag concept art 27.jpg|Concept art of Edward looking at vials in the Observatory | Assassin's Creed IV Black Flag concept art 27.jpg|Concept art of Edward looking at vials in the Observatory | ||
AC4 Blood vial concept mechanics.jpg|Concept art and mechanics of a blood vial | AC4 Blood vial concept mechanics.jpg|Concept art and mechanics of a blood vial | ||
AC4 promo 4.jpg|Edward showing a blood vial to Charles Vane | |||
AC4 promo 4.jpg|Edward showing Charles Vane | |||
And My Sugar 7.png|Edward recovering a stolen blood vial | And My Sugar 7.png|Edward recovering a stolen blood vial | ||
Black Bart's Gambit 9.png|Edward looking at a vial recovered from a Portuguese fleet | Black Bart's Gambit 9.png|Edward looking at a vial recovered from a Portuguese fleet | ||
Tainted Blood 2.png|Edward inserting a vial into a Crystal Skull | |||
Tainted Blood 2.png|Edward inserting a vial into | |||
ACi-BloodScreen.jpg|An unknown Initiate with a blood vial | ACi-BloodScreen.jpg|An unknown Initiate with a blood vial | ||
ACi-TheLookOfLove.jpg|Deanna Geary takes a sample of Milton Jones' blood | ACi-TheLookOfLove.jpg|Deanna Geary takes a sample of Milton Jones' blood | ||
AC4 Blood Vial.png|An Abstergo Industries sketch of a blood vial | AC4 Blood Vial.png|An Abstergo Industries sketch of a blood vial | ||
AC4 Blood Vial prop 2.png|Close-up of the blood vial prop | AC4 Blood Vial prop 2.png|Close-up of the blood vial prop | ||
ACI Blood Vial Code Unlock.png|The unlocked ''Initiates'' "database" entry | ACI Blood Vial Code Unlock.png|The unlocked ''Initiates'' "database" entry | ||
| Line 71: | Line 76: | ||
*''[[Assassin's Creed: Initiates]]'' | *''[[Assassin's Creed: Initiates]]'' | ||
*''[[Assassin's Creed: Identity]]'' {{Del}} | *''[[Assassin's Creed: Identity]]'' {{Del}} | ||
*''[[Assassin's Creed: Rogue]]'' {{po}} | |||
*''[[Assassin's Creed: Syndicate]]'' | *''[[Assassin's Creed: Syndicate]]'' | ||
==References== | ==References== | ||
{{Reflist}} | {{Scroll box|content={{Reflist}}}} | ||
[[Category:Isu technology]] | [[Category:Isu technology]] | ||
[[Category:Objects]] | [[Category:Objects]] | ||
Revision as of 01:02, 15 April 2024

Blood vials are small crystalline cubes, designed by the Isu to contain drops of an individual's blood for the purpose of viewing their actions through the Observatory.
Design and purpose
The cubes comprised of two parts, the larger container and the lid, made by way of a planar slice through one corner so that it resembled a "whole edge" vertex figure. The lid could not fully detach, but instead was fixed by magnets to slide up and down along a path. The absolute center of the cube had microscopic spikes that punctured skin, drew blood, and then held the sample in place.[1]
Once a blood sample was collected, the cube was placed inside the Crystal Skull that powered the Observatory, which would then project what the donor saw and heard in real time.[2] It was for this reason that the Templars first during the Golden Age of Piracy[3] and centuries later in the present sought the Observatory,[4] hoping that they might make use of its surveillance abilities to spy on and blackmail numerous government officials.[3][4]
History
Isu Era
During the Isu Era, thousands of Isu had their blood sampled in vials which were then stored at the Observatory.[2] However, following their extinction after the Great Catastrophe,[5] their knowledge of how the cubes worked and their purpose died with them, with the crystals additionally becoming materially worthless as they could not provide live feedback as intended.[2]
Golden Age of Piracy
Around April 1673,[6] the carpenter and Sage Thomas Kavanagh, Jr. set sail from Tulum[7] after spending a week[8] with the West Indies Assassins' Mentor Bahlam, who explained Thom's nature as a Sage,[9] the visions that plagued him, and their connection to the Observatory.[8] After a year of travel, he finally arrived at Long Bay, Jamaica and reached the Observatory, which he entered to explore and saw the vials along its main hallway.[10] Thom stayed in the main chamber with the Observatory's armillary sphere and vial collection for a week, during which time he learned all he could about Aita's conflicting identity inside his head.[11]
Decades later in 1714, the British Assassin Duncan Walpole decided to betray his comrades and join the West Indies Templars, dissatisfied at being passed over for promotion both within the Assassins and at his job in the East India Company.[12] Upon arriving in the Caribbean in 1715[13] on an assignment to train under the new local Mentor Ah Tabai,[14] Walpole wrote to the Templars' Grand Master Laureano de Torres y Ayala offering to meet in Havana and deliver "the information [they] desire" as proof of his new allegiance;[13] namely, an empty blood vial[15] and maps of Assassin camps in the surrounding areas.[16]
Duncan boarded the Royal Navy frigate HMS Intrigue heading to Havana, but he never reached his destination. In June 1715, the ship met the pirate brig Jacobite off the coast of Cape Bonavista and attacked it. In the skirmish, the Intrigue sank, but not before setting the Jacobite's gunpowder alight with a cannon volley, blowing both ships to splinters and washing a wounded Duncan ashore with his belongings and the Jacobite's only survivor, Edward Kenway. When Edward tried to haggle a price for helping Duncan reach Havana, he fled into the jungle, initiating a chase that ended when Edward killed Duncan, looted the cube and maps in his bag, and assumed his identity to claim the rewards himself, unaware of their wider importance.[13]

Edward reached Havana in early July,[17] only to immediately lose the blood vial and maps when soldiers from the occupying Spaniards seized "his" effects[18] once he escaped a bar brawl,[17] though he quickly infiltrated the nearby Castillo de San Salvador de la Punta and recovered the objects[18] which he promptly delivered to Torres and the other Templars.[3]
In September 1719, the new Sage Bartholomew Roberts interrogated a sailor from the Portuguese Navy and learned that they had acquired a large chest of vials with active blood samples. Wanting the vials himself, he convinced Edward to sail the Jackdaw into the heart of the navy under a false flag, capture the Man O' War flagship Nosso Senhor da Compreensão that held the vials, and escape with both prizes. Although the Portuguese caught onto the ruse, it was too late to stop Edward and Roberts, who sank their pursuers and made off with two chests of vials.[19]
One of the recovered chests was full of empty cubes, but the other had many active blood samples, including those of the Templars themselves; spcifically, the late slaver Laurens Prins, the Bahaman governor Woodes Rogers, the pirate Benjamin Hornigold, and even Grand Master Torres.[19] Unbeknownst to Edward at the time, while Torres had taken samples from his fellow Templars to ensure their loyalty, he had never donated a sample of his own blood, instead using that of a decoy and intentionally mislabeling it.[20]

In September 1722, Torres and a host of Templars arrived at the Observatory, intending to claim it for themselves. As a first order of business, Torres ordered that the hundreds of vials with Isu DNA be packed and transported to an undisclosed location. When Edwarf tracked Torres to the Observatory and assassinated him, he noted the vials' absence from their wall alcoves, prompting Ah Tabai and the West Indies Assassins to devote their resources to locating the vials.[21]
The recovery mission had a partial success just days later when an Assassin scout identified and tailed a group of survivors from Torres' expedition party who had pocketed some vials. The scout followed one of them to Havana, but instead of reporting his findings to the Assassin bureau, he decided to try and retrieve the vial alone. Weary from his long trip tracking his target, however, the Assassin was quickly overwhelmed by the Templar, who poisoned him and forced the scout to retreat.[22]
The wounded man returned to the bureau, but when he died shortly after, another Assassin was tasked with hunting down the Templar, killing him, and recovering the vial,[22] though whether they succeeded was unclear. This instance was the Assassins' sole contact with the vials after their relocation, as the majority of the cubes stayed unaccounted for and were lost to time.
Modern times
In 1868, when Evie Frye and Henry Green infiltrated the Kenway Mansion looking for clues on the Shroud of Eden, they found a blood vial among Edward's possessions,[23] which he had either kept as a memento from his pirating days or had recovered sometime during his later years working for the British Assassins.
During World War I, a member of the Instruments of the First Will known only as the "Master Spy" manipulated the Templars into sending two German Army spies to pose as a nurse and her aide and collect blood vial samples from a British Army medical camp in London. When Winston Churchill informed the British Assassin Lydia Frye of this medical malpractice, she assassinated the pair, stopping the Master Spy's plans.[24]
By the 1980s, Abstergo Industries had taken great interest in securing more vials and had found dozens since then. Of all of those recovered, only three vials had the DNA inside fully intact, and only one of the three contained Isu blood. In 2013, Abstergo described them in an internal memo, along with other Isu artifacts.[25][26] On 2 November of that year, an Initiate spy escaped Abstergo Entertainment with one of the vials.[27]
On 16 December, in Abstergo's facility in Philadelphia, nurse Deanna Geary from the Lineage Discovery and Acquisition department performed a medical check up on the company's new employee, Milton Jones. As Geary took a sample of Jones' blood in a vial, she told him it was standard policy for company health records. She was unaware that her supervising doctor Damian Saravakos was a Templar and had analyzed the sample himself, then reported to the department director and Inner Sanctum member Mitsuko Nakamura that Jones was subject of interest given his descent from Edward's quartermaster Adéwalé.[28]
By 2014, Abstergo had recovered several more blood vials and gave the samples to Dr. Álvaro Gramática to study from his facility in Paris, but the vials were destroyed in an Assassin attack by Shaun Hastings and the Russian Assassin Galina Voronina.[29]
Behind the scenes
In the E3 2013 trailer for Assassin's Creed IV: Black Flag, Edward sails the Jackdaw into combat with a Templar ship, boards the enemy vessel, and kills the Templar commanding it. While he inspects a looted blood vial at night, he is watched from afar by an unnamed Woodes Rogers aboard his ship Delicia, which was historically documented to have participated in the raid on Nassau in 1720. However, neither Woodes or Edward have such scenes in-game or express knowledge of what they saw, nor does Woodes' ship ever appear. In similar fashion, a promotional image has Edward holding a vial and discussing it over beer in the captain's cabin with Charles Vane, even though he never confided such knowledge to Vane in Black Flag.

In 2013, Ubiworkshop sold a limited run of blood vial props for $59.99 USD as part of a promotion for the Assassin's Creed: Initiates site. The acrylic cubes measured 2 cubic inches (5 cubic centimeters) and came with a stand and a box cover with the Abstergo Industries logo. The first 500 units sold came with an Initiates code[30] that was etched low enough on one of its faces to be obscured by the stand's lip, and a coded letter written in hexadecimal.[31] The code unlocked an Initiates "database" entry for it, a special avatar of Bartholomew Roberts for users, and an exclusive side quest.[32]
In the game files for Assassin's Creed: Identity, there is a database entry which mentions a blood vial, though it does not appear in the game itself. The following paragraph details this entry.
- Sometime in 1499, Caterina Sforza visited Monteriggioni and told the Italian Assassin Ezio Auditore about a secret room her late husband Girolamo Riario had beneath the Rocca di Ravaldino in the city of Forlì, where he kept various treasures for his Italian Templar brethren. Believing the chamber would hold important information as well, Ezio asked fellow Assassin Lo Sparviero to try and find a man named Andrea Migli, Girolamo's left hand and the only man with any knowledge of the vault's location but whom Caterina suspected was already dead.[33] Lo Sparviero tried to search for Andrea, but in the process learned of a key-medallion that could open the chamber. Once Ezio acquired it, he used it to enter the secret room to investigate. He later returned empty-handed and informed Niccolò Machiavelli that the buried chamber held many undisclosed secrets, among which was "a cube with a red substance inside". Although Ezio did not recognize what it was nor did he ever realize its importance, he sent the cube to his polymath ally Leonardo da Vinci, but never heard back from the inventor,[33] who by then was captured and forcibly employed by Cesare Borgia to make war machines.[34]
In Assassin's Creed: Rogue, a picture of a blood vial, alongside other Isu artifacts including Apples of Eden, Crystal Balls and Crystal Skulls, can be seen on a notice board inside the Davenport Homestead.[35]
Gallery
-
 Concept art of Edward looking at vials in the Observatory
 -
 Concept art and mechanics of a blood vial
 -
 Edward showing a blood vial to Charles Vane
 -
 Edward recovering a stolen blood vial
 -
 Edward looking at a vial recovered from a Portuguese fleet
 -
 Edward inserting a vial into a Crystal Skull
 -
 An unknown Initiate with a blood vial
 -
 Deanna Geary takes a sample of Milton Jones' blood
 -
 An Abstergo Industries sketch of a blood vial
 -
 Close-up of the blood vial prop
 -
 The unlocked Initiates "database" entry


Appearences
- Assassin's Creed IV: Black Flag (first appearance)
- Assassin's Creed: Black Flag
- Assassin's Creed: Awakening (non-canon)
- Assassin's Creed: Initiates
- Assassin's Creed: Identity (appears in deleted scene(s) only)
- Assassin's Creed: Rogue Template:Po
- Assassin's Creed: Syndicate