Welcome to Assassin's Creed Wiki! Log in and join the community.
Category:Fair use files
Jump to navigation
Jump to search
These files are copyrighted. The individual who uploaded this work and first used it in an article, and subsequent persons who place it into articles, assert that this qualifies as fair use of the material under United States copyright law.
To add to this category, type {{Fairuse}} on the image information page
Media in category "Fair use files"
The following 200 files are in this category, out of 23,382 total.
(previous page) (next page)-
 077.jpg 616 × 800; 312 KB
-
 08 Ezio.jpg 1,280 × 720; 126 KB
-
 09 Aveline.jpg 1,280 × 720; 134 KB
-
 1022.jpg 1,920 × 1,080; 1.25 MB
-
 1380370 10151728259353068 1341138230 n.jpg 720 × 405; 61 KB
-
 150910 detail.jpg 1,414 × 1,500; 458 KB
-
 1777 New Orleans Downtown street by EddieBennun.jpg 1,600 × 625; 391 KB
-
 1777 New Orleans panoramic view by EddieBennun.jpg 1,600 × 803; 379 KB
-
 1997 Drawing of Memphis - Jean-Claude Golvin.jpg 1,920 × 1,080; 1.76 MB
-
 1D birthday.jpg 493 × 628; 79 KB
-
 404 Éditions Logo.jpg 550 × 550; 11 KB
-
 458px-Desmond Miles.jpg 480 × 620; 43 KB
-
 45px-Facebook icon.png 45 × 45; 3 KB
-
 45px-Google icon.png 45 × 45; 3 KB
-
 45px-Twitter icon.png 45 × 45; 3 KB
-
 519px-Pickpocket.jpg 519 × 649; 46 KB
-
 878 AD teaser.jpg 920 × 550; 60 KB
-
 A Change of Plans.jpg 1,152 × 645; 305 KB
-
 A Coward's Tool.jpg 1,900 × 1,069; 1.35 MB
-
 A Friend Indeed.png 240 × 240; 21 KB
-
 A new jerusalem.jpg 400 × 399; 60 KB
-
 A Powerful Slaver.jpg 1,507 × 1,014; 530 KB
-
 A Surprise Visit.jpg 968 × 756; 109 KB
-
 A taste for violence.jpg 310 × 182; 11 KB
-
 A Wolf in Sheep's Clothing.png 240 × 240; 9 KB
-
 A Woman's Touch.jpg 946 × 535; 183 KB
-
 Abandoned plantation by EddieBennun.jpg 1,600 × 860; 350 KB
-
 Abbas - Concept Art.jpg 900 × 1,989; 636 KB
-
 ABBoV - Benedetto.jpg 770 × 1,000; 70 KB
-
 Abia the Shaded.jpg 1,200 × 675; 140 KB
-
 ABrashAmerican.jpg 1,594 × 724; 142 KB
-
 Abstergo Assault Concept.JPG 796 × 440; 51 KB
-
 Abstergo Car Park Concept.jpg 1,200 × 710; 793 KB
-
 Abstergo Entertainment lift.jpg 1,647 × 1,050; 341 KB
-
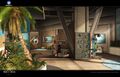
 Abstergo Entertainment Security room.jpg 1,600 × 1,020; 494 KB
-
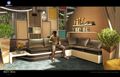 Abstergo Entertainment sofa area.jpg 1,600 × 1,020; 499 KB
-
 Abstergo Entertainment tablet.jpg 1,920 × 1,224; 313 KB
-
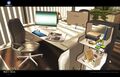 Abstergo Entertainment work area props.jpg 1,600 × 1,020; 469 KB
-
 Abstergo Entertainment work area.jpg 1,600 × 1,020; 581 KB
-
 Abstergo Entertainment Working area cubicle.jpg 1,600 × 1,020; 501 KB
-
 Abstergo Entertainment – Employee Handbookl-sketch of Altaïr Ibn-La'Ahad.jpg 1,280 × 1,656; 826 KB
-
 Abstergo Entertainment – Employee Handbookl-sketch of Edward Kenway.jpg 1,280 × 1,656; 859 KB
-
 Abstergo Entertainment – Employee Handbookl-sketch of Ezio Auditore da Firenze.jpg 1,280 × 1,656; 912 KB
-
 Abstergo Escape Concept.jpg 1,200 × 710; 569 KB
-
 Abstergo Laboratories concept.jpg 720 × 395; 36 KB
-
 Abstergo security guard concept.jpg 1,356 × 2,048; 796 KB
-
 Abstergo-FH.png 1,570 × 1,405; 124 KB
-
 Abstergo.com starting screen.jpg 1,005 × 490; 34 KB
-
 Abstergo.insighteditions.com 1.png 1,024 × 576; 157 KB
-
 Abstergo.insighteditions.com 2.png 1,920 × 1,080; 325 KB
-
 Abstergo.insighteditions.com 3.png 1,920 × 1,080; 332 KB
-
 AbstergoAnimusConcept.jpg 954 × 589; 458 KB
-
 AbstergoAnimusRoomConcept2.jpg 1,476 × 931; 201 KB
-
 AbstergoIndustriesLogoWhite.png 4,500 × 1,390; 455 KB
-
 AC - Altair flees Crusaders.jpg 1,592 × 2,300; 945 KB
-
 AC - Altair stabs Templar Knight.jpg 1,806 × 2,500; 647 KB
-
 AC - Arturo executes the Templar.png 2,017 × 2,401; 5.14 MB
-
 AC - Arturo organizes a hunt for the Assassins.png 2,017 × 1,368; 1.98 MB
-
 AC - Arturo threatens Charlotte.png 1,810 × 390; 457 KB
-
 AC - Arturo with his girlfriend.png 1,804 × 911; 1.44 MB
-
 AC - Arturo wounded.png 1,114 × 1,086; 1.23 MB
-
 AC - Arturo's final moments.png 1,798 × 1,068; 1.91 MB
-
 AC - Assasins tell Charlotte about Joseph.png 575 × 932; 722 KB
-
 AC - Assassins and Erudito meeting.png 2,017 × 1,124; 2.66 MB
-
 AC - Ayar and Quila tells Tuti Cusi of the assassination plot.png 1,818 × 1,377; 3.76 MB
-
 AC - Ayar frees Quila.png 1,392 × 1,056; 1.69 MB
-
 AC - Ayar prepares to execute Quila.png 2,017 × 2,119; 5.03 MB
-
 AC - Ayar stopping his father from escaping.png 2,137 × 1,228; 3.72 MB
-
 AC - Brad.jpg 576 × 1,000; 468 KB
-
 AC - Buenos Aires Airport.png 2,162 × 557; 1.36 MB
-
 AC - Cartels ambushing Ortega.png 1,952 × 2,252; 7.58 MB
-
 AC - Chapultepec Park.jpg 2,017 × 1,279; 2.19 MB
-
 AC - Charlotte agrees with Kody's request to rest.png 884 × 455; 542 KB
-
 AC - Charlotte ask Kody about using the Darknet.png 1,798 × 788; 1.86 MB
-
 AC - Charlotte asks Galina about working with Erudito.png 2,018 × 1,191; 3.14 MB
-
 AC - Charlotte discuss Giovanni's memories with Florencia and Guernica.png 1,807 × 1,151; 2.47 MB
-
 AC - Charlotte finds Brad dead.png 1,796 × 773; 1.85 MB
-
 AC - Charlotte Galina and Kody in a motel.png 1,225 × 833; 973 KB
-
 AC - Charlotte knocks out Whittaker.png 2,686 × 1,634; 6.55 MB
-
 AC - Charlotte makes a deal with Ortega.png 1,796 × 1,185; 2.11 MB
-
 AC - Charlotte meets Whittaker.png 1,799 × 880; 1.41 MB
-
 AC - Charlotte mourning Kody's death.png 1,529 × 1,096; 2.85 MB
-
 AC - Charlotte prepares for Animus session at Erudito lab.png 2,017 × 750; 2.22 MB
-
 AC - Charlotte proposes Assassins and Erudito work together.png 2,017 × 2,033; 4.25 MB
-
 AC - Charlotte questions Florencia about Hiram Stoddard.png 1,799 × 926; 2.05 MB
-
 AC - Charlotte subdues Brad.png 2,017 × 1,008; 2.31 MB
-
 AC - Charlotte warns Florencia of a trap in the cave.png 2,991 × 1,341; 6.32 MB
-
 AC - Charlotte witnessing Juno's visions.png 2,013 × 3,056; 9.33 MB
-
 AC - Charlotte, Florencia and Kody fleeing from fire.png 1,800 × 575; 1.16 MB
-
 AC - Didier and Templars monitoring Joseph and Charlotte.png 1,994 × 759; 1.88 MB
-
 AC - Didier Hawking.png 700 × 950; 744 KB
-
 AC - Diego de Cuervo holding Quila and Pardo hostage.png 1,811 × 484; 1.37 MB
-
 AC - Diego falls to his death.png 1,200 × 908; 1.48 MB
-
 AC - Emperor Manco being attacked.png 2,119 × 892; 2.76 MB
-
 AC - Estadio Azteca.jpg 2,017 × 836; 764 KB
-
 AC - Execution of Bridget Bishop.png 2,017 × 3,057; 8.54 MB
-
 AC - Ezio gives Dante's book to Giovanni.png 1,813 × 679; 2.1 MB
-
 AC - Florencia acknowledging Charlotte abilities.png 2,689 × 1,560; 6.07 MB
-
 AC - Florencia and Erudito in the Assassin helicopter.png 2,690 × 1,497; 5.76 MB
-
 AC - Florencia consoles Charlotte about Kody's death.png 2,687 × 1,678; 5.61 MB
-
 AC - Florencia insults Charlotte in a fit of rage.png 2,690 × 867; 3.74 MB
-
 AC - Florencia orders a scan for Charlotte.png 2,017 × 1,058; 2.75 MB
-
 AC - Galina and Kody questions Charlotte.png 1,795 × 564; 927 KB
-
 AC - Galina fights against Joseph.png 1,804 × 655; 1.39 MB
-
 AC - Galina intimidates Charlotte into joining her plan.png 1,811 × 1,387; 2.15 MB
-
 AC - Galina sparring with Myshell and Sheed.png 1,814 × 2,026; 5.86 MB
-
 AC - Galina with a sniper rifle.png 1,909 × 787; 975 KB
-
 AC - Galina's team and Erudito members rescued.png 1,862 × 1,320; 3.97 MB
-
 AC - Garcia-Lopes attacks Charlotte.png 2,017 × 680; 1.07 MB
-
 AC - Garcia-Lopez being followed by Charlotte.png 576 × 1,372; 680 KB
-
 AC - Garnier de Naplouse.png 284 × 620; 249 KB
-
 AC - George Orwell showing Ignacio weapons at a black market.png 1,818 × 687; 1.59 MB
-
 AC - Giovanni blaming Hiram for their failure.png 1,791 × 500; 1.39 MB
-
 AC - Giovanni defeats Hiram.png 1,203 × 736; 1.2 MB
-
 AC - Giovanni holding an Apple of Eden.png 1,199 × 1,509; 2.7 MB
-
 AC - Hajime escaping the Great Purge with Tomo.png 1,895 × 484; 1.25 MB
-
 AC - Hiram attacks Dei Petrucci's convoy.png 2,017 × 1,442; 4.67 MB
-
 AC - Hiram takes the artifact from Petrucci.png 1,182 × 706; 1.3 MB
-
 AC - Hiram training with Giovanni.png 1,808 × 766; 1.87 MB
-
 AC - Hiram with Giovanni and Michelangelo.png 1,837 × 912; 3.11 MB
-
 AC - Ignacio Cardona greeted by George Orwell.png 1,875 × 1,435; 2.58 MB
-
 AC - Jabal concept.png 232 × 490; 102 KB
-
 AC - Jennifer meets her fellow Assassin.png 1,036 × 799; 1.14 MB
-
 AC - Jennifer Querry's death.png 2,017 × 1,187; 3.17 MB
-
 AC - Joseph ambushes Xavier and Galina.png 1,997 × 1,501; 4.22 MB
-
 AC - Joseph attempts to capture Zehra Okur.png 1,046 × 746; 1.07 MB
-
 AC - Joseph offers to help Galina and Erudito.png 1,799 × 1,367; 3.31 MB
-
 AC - Joseph suffers serious burns.png 2,986 × 1,387; 5.69 MB
-
 AC - Joseph with Didier and the Templars.jpg 2,012 × 1,159; 1.03 MB
-
 AC - Joseph's final moments.png 2,694 × 1,832; 5.47 MB
-
 AC - Kody concerned for Charlotte's health.png 1,916 × 806; 2.11 MB
-
 AC - Kody hands Charlotte a hoodie.png 1,791 × 851; 2.23 MB
-
 AC - Kody held hostage.png 2,013 × 982; 2.8 MB
-
 AC - Kody interrupting Charlotte's scan.png 1,804 × 664; 1.66 MB
-
 AC - Kody monitoring Charlotte's session.png 1,808 × 605; 1.45 MB
-
 AC - Kody on a plane with Charlotte and Galina.png 1,960 × 512; 1.5 MB
-
 AC - Kody tailing Garcia-Lopez.png 1,805 × 578; 1.4 MB
-
 AC - Kody tells Charlotte about Templars arriving.png 1,793 × 956; 2.23 MB
-
 AC - Kody voicing his distrust towards Florencia and Erudito.png 1,831 × 911; 2.03 MB
-
 AC - Kody's death.png 1,650 × 2,500; 7.14 MB
-
 AC - limited edition.jpg 6,496 × 5,083; 1.78 MB
-
 AC - Manco tries to stop the fight.png 2,298 × 700; 2.2 MB
-
 AC - Miguel and Dwight attacking Ignacio and Albert.png 1,848 × 1,007; 2.67 MB
-
 AC - Miguel forced to stab Dwight by Albert.png 1,914 × 860; 2.37 MB
-
 AC - Miguel holds Albert at gunpoint.png 951 × 1,266; 1.55 MB
-
 AC - Miguel slashing Albert's stomach.png 1,339 × 823; 1.34 MB
-
 AC - Myshell attacks Joseph from behind.png 1,814 × 631; 1.31 MB
-
 AC - Ortega and Whittaker at Erudito facility.png 2,695 × 1,004; 3.05 MB
-
 AC - Ortega asks Arturo to stop his hunt.png 1,807 × 1,394; 3.19 MB
-
 AC - Ortega confronts Charlotte.png 2,829 × 2,055; 9.53 MB
-
 AC - Ortega meets Charlotte.png 1,806 × 1,165; 2.67 MB
-
 AC - Ortega waiting for Charlotte.png 934 × 1,263; 1.38 MB
-
 AC - Ortega's death.png 2,982 × 1,919; 9.62 MB
-
 AC - Pardo antagonizing Diego.png 1,810 × 1,129; 2.83 MB
-
 AC - Pardo in a drunken state.png 1,819 × 1,527; 3.23 MB
-
 AC - Pardo knocking out the attackers.png 1,810 × 1,350; 3.4 MB
-
 AC - Pardo offers Quila an opening into the Assassin Brotherhood.png 1,026 × 1,665; 2.28 MB
-
 AC - Pardo refuses to follow Quila and Ayar.png 1,371 × 1,042; 1.38 MB
-
 AC - Pardo stops the attacker from killing the Emperor.png 2,292 × 1,744; 5.51 MB
-
 AC - Pardo tells Quila of his failed mission.png 1,917 × 1,470; 2.86 MB
-
 AC - Pardo trips and falls.png 1,797 × 1,590; 4 MB
-
 AC - Pardo trying to help and warn Quila.png 1,826 × 1,819; 4.4 MB
-
 AC - Quila and Pardo at a tavern.png 1,815 × 813; 1.9 MB
-
 AC - Quila and Pardo discussion.png 1,816 × 1,382; 3.16 MB
-
 AC - Quila appointed as Manco's personal messenger.png 2,133 × 1,456; 3.47 MB
-
 AC - Quila defending herself against the attacking chasqui.png 2,017 × 947; 2.77 MB
-
 AC - Quila knocked out by fellow chasquis.png 2,017 × 1,458; 3.72 MB
-
 AC - Quila meets with her ex husband Ayar.png 1,814 × 815; 2.4 MB
-
 AC - Quila riding with Pardo.png 1,818 × 2,076; 4.73 MB
-
 AC - Quila stops Manco from drinking the concoction.png 2,129 × 1,064; 2.94 MB
-
 AC - Quila trying to steal Pardo's horse.png 1,815 × 1,533; 3.93 MB
-
 AC - Salem witch trials.jpg 1,066 × 737; 597 KB
-
 AC - Salton Sea.png 1,794 × 464; 1.2 MB
-
 AC - Samuel releases Tom and David.png 2,017 × 684; 1.54 MB
-
 AC - San Diego 2.jpg 1,356 × 813; 897 KB
-
 AC - Sheed and Myshell keeping watch on Zehra.png 1,805 × 516; 1.61 MB
-
 AC - Sheed killed in plane crash.png 2,688 × 857; 3.2 MB
-
 AC - Sheed points a gun at Joseph.png 1,186 × 1,029; 1.52 MB
-
 AC - Templars torturing Tom and Jennifer.png 923 × 723; 1.03 MB
-
 AC - The Assassins and Myshell agree to locate Templar ship.png 2,870 × 1,013; 4.13 MB
-
 AC - The Assassins sparring with Norbert.png 1,795 × 1,231; 3.33 MB
-
 AC - The Assassins with Abdul during a campfire.png 1,763 × 579; 1.23 MB
-
 AC - Tom finds Dorothy in cage.png 1,825 × 1,510; 3.78 MB
-
 AC - Tom speaking to a Consus-possesed Dorothy.png 1,804 × 465; 1.21 MB
-
 AC - Treo Tea office.png 1,998 × 930; 2.57 MB
-
 AC - Tuti Cusi accuses Quila of being a traitor.png 2,017 × 2,419; 5.96 MB
-
 AC - Tuti Cusi orders Quila and Pardo's execution in the mountainside.png 1,810 × 1,033; 2.01 MB
-
 AC - Tuti Cusi tells Quila of his true plan.png 2,123 × 720; 2.05 MB
-
 AC - Tuti Cusi tries to escape.png 2,141 × 557; 1.48 MB
-
 AC - Whittaker and Epsilon Team arrives on Erudito Island.png 1,915 × 1,942; 4.41 MB
-
 AC - Whittaker confronts Charlotte.png 2,677 × 1,460; 5.42 MB
-
 AC - Whittaker.png 348 × 600; 236 KB
-
 AC - William Stoughton and Samuel Parris.png 2,017 × 1,549; 4.06 MB
-
 AC - Xavier introduces Kody.png 1,794 × 605; 1.26 MB
-
 AC - Yuri entrusting Tomo to Hajime.png 939 × 732; 917 KB
-
 AC - Zehra escorted away by guards.png 1,798 × 595; 1.62 MB
-
 AC 1 NYCC variant Calero.jpg 1,200 × 910; 293 KB
-
 AC 1 retailer variant Casagrande.jpg 900 × 1,366; 309 KB
-
 AC 1 retailer variant Garbett.jpg 900 × 1,366; 396 KB
-
 AC 1 retailer variant Hernandez.jpg 900 × 1,366; 263 KB


