Welcome to Assassin's Creed Wiki! Log in and join the community.
Multiplayer/ACR: Difference between revisions
Jump to navigation
Jump to search
No edit summary |
imported>Sol Pacificus mNo edit summary |
||
| (9 intermediate revisions by 8 users not shown) | |||
| Line 1: | Line 1: | ||
{{Era|ACR| | {{Era|ACR|RW}} | ||
This page details the various locations and characters included within the multiplayer of ''[[Assassin's Creed: Revelations]]''. | This page details the various locations and characters included within the multiplayer of ''[[Assassin's Creed: Revelations]]''. | ||
| Line 22: | Line 22: | ||
|- | |- | ||
![[Count]] | ![[Count]] | ||
![[Courtesan]] | ![[Courtesan (Animi Avatar)|Courtesan]] | ||
![[Crusader]] | ![[Crusader]] | ||
![[Deacon]] | ![[Deacon]] | ||
|} | |} | ||
{|border="0" cellspacing="3" cellpadding="0" align="center" style="font-size:90%" | {| border="0" cellspacing="3" cellpadding="0" align="center" style="font-size:90%" | ||
|[[File:GladiatorWall.png|150px|link=Gladiator]] | |[[File:GladiatorWall.png|150px|link=Gladiator (Animi Avatar)]] | ||
|[[File:GuardianWall.png|150px|link=Guardian]] | |[[File:GuardianWall.png|150px|link=Guardian (Animi Avatar)]] | ||
|[[File:KnightWall.png|150px|link=Knight]] | |[[File:KnightWall.png|150px|link=Knight]] | ||
|[[File:OttomanDoctorWall.png|150px|link=Ottoman Doctor]] | |[[File:OttomanDoctorWall.png|150px|link=Ottoman Doctor]] | ||
|- | |- | ||
![[Gladiator]] | ![[Gladiator (Animi Avatar)|Gladiator]] | ||
![[Guardian]] | ![[Guardian (Animi Avatar)|Guardian]] | ||
![[Knight]] | ![[Knight]] | ||
![[Ottoman Doctor]] | ![[Ottoman Doctor]] | ||
|} | |} | ||
{|border="0" cellspacing="3" cellpadding="0" align="center" style="font-size:90%" | {| border="0" cellspacing="3" cellpadding="0" align="center" style="font-size:90%" | ||
|[[File:OttomanJesterWall.png|150px|link=Ottoman Jester]] | |[[File:OttomanJesterWall.png|150px|link=Ottoman Jester]] | ||
|[[File:PrivateerWall.png|150px|link=Privateer]] | |[[File:PrivateerWall.png|150px|link=Privateer (Animi Avatar)]] | ||
|[[File:RenegadeWall.png|150px|link=Renegade]] | |[[File:RenegadeWall.png|150px|link=Renegade]] | ||
|[[File:SentinelWallNew.png|150px|link=Sentinel]] | |[[File:SentinelWallNew.png|150px|link=Sentinel]] | ||
|- | |- | ||
![[Ottoman Jester]] | ![[Ottoman Jester]] | ||
![[Privateer]] | ![[Privateer (Animi Avatar)|Privateer]] | ||
![[Renegade]] | ![[Renegade]] | ||
![[Sentinel]] | ![[Sentinel]] | ||
|} | |} | ||
{|border="0" cellspacing="3" cellpadding="0" align="center" style="font-size:90%" | {| border="0" cellspacing="3" cellpadding="0" align="center" style="font-size:90%" | ||
|[[File:ThespianWall.png|150px|link=Thespian]] | |[[File:ThespianWall.png|150px|link=Thespian]] | ||
|[[File:TricksterWallNew.png|150px|link=Trickster]] | |[[File:TricksterWallNew.png|150px|link=Trickster]] | ||
| Line 64: | Line 64: | ||
==Locations== | ==Locations== | ||
{|border="0" cellspacing="3" cellpadding="0" align="center" style="font-size:90%" | {| border="0" cellspacing="3" cellpadding="0" align="center" style="font-size:90%" | ||
|[[File:Antioch-thumb.png|144px|link=Antioch]] | |[[File:Antioch-thumb.png|144px|link=Antioch]] | ||
|[[File:GondalfoWall.png|150px|link=Castel Gandolfo]] | |[[File:GondalfoWall.png|150px|link=Castel Gandolfo]] | ||
|[[File:Galata-thumb.png|144px|link=Galata | |[[File:Galata-thumb.png|144px|link=Galata District]] | ||
|[[File:IpokratousWall.jpg|150px|link=Ippokratous]] | |[[File:IpokratousWall.jpg|150px|link=Ippokratous]] | ||
|- | |- | ||
![[Antioch]] | ![[Antioch]] | ||
![[Castel Gandolfo]] | ![[Castel Gandolfo]] | ||
![[Galata | ![[Galata District|Galata]] | ||
![[Ippokratous]] | ![[Ippokratous]] | ||
|} | |} | ||
{| border="0" cellspacing="3" cellpadding="0" align="center" style="font-size:90%" | |||
{|border="0" cellspacing="3" cellpadding="0" align="center" style="font-size:90%" | |||
|[[File:HospitalWall.png|150px|link=Knight's Hospital]] | |[[File:HospitalWall.png|150px|link=Knight's Hospital]] | ||
|[[File:MntWall.png|150px|link=Mont Saint-Michel]] | |[[File:MntWall.png|150px|link=Mont Saint-Michel]] | ||
|[[File:RomeWall.png|150px|link=Rome | |[[File:RomeWall.png|150px|link=Rome]] | ||
|[[File: | |[[File:DonatoWall.png|150px|link=San Donato]] | ||
|- | |- | ||
![[Knight's Hospital]] | ![[Knight's Hospital]] | ||
![[Mont Saint-Michel]] | ![[Mont Saint-Michel]] | ||
!Rome | ![[Rome]] | ||
![[ | ![[San Donato]] | ||
|} | |} | ||
{|border="0" cellspacing="3" cellpadding="0" align="center" style="font-size:90%" | {| border="0" cellspacing="3" cellpadding="0" align="center" style="font-size:90%" | ||
|[[File:SienaWall.png|150px|link=Siena]] | |||
|[[File:SoukWall.jpg|150px|link=Souk]] | |||
|[[File:VeniceWall.png|150px|link=Venice]] | |[[File:VeniceWall.png|150px|link=Venice]] | ||
|- | |- | ||
![[Siena]] | |||
![[Souk]] | |||
![[Venice]] | ![[Venice]] | ||
|} | |} | ||
[[Category:Assassin's Creed: Revelations multiplayer]] | [[Category:Assassin's Creed: Revelations multiplayer]] | ||
Latest revision as of 15:38, 19 July 2022
This page details the various locations and characters included within the multiplayer of Assassin's Creed: Revelations.
Characters[edit | edit source]
|

|

|

|
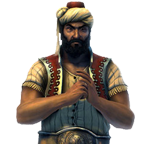
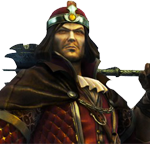
| Bombardier | Brigand | Champion | Corsair |
|---|
|

|

|

|
| Count | Courtesan | Crusader | Deacon |
|---|

|

|
|

|
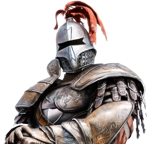
| Gladiator | Guardian | Knight | Ottoman Doctor |
|---|
|

|

|
|
| Ottoman Jester | Privateer | Renegade | Sentinel |
|---|
|

|

|

|
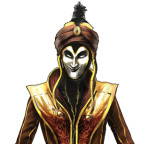
| Thespian | Trickster | Vanguard | Vizier |
|---|
Locations[edit | edit source]

|

|

|

|
| Antioch | Castel Gandolfo | Galata | Ippokratous |
|---|

|

|

|

|
| Knight's Hospital | Mont Saint-Michel | Rome | San Donato |
|---|

|

|

|
| Siena | Souk | Venice |
|---|