Isu map: Difference between revisions
imported>Gener4l Cl4ank4 No edit summary |
imported>Darman36 No edit summary |
||
| Line 5: | Line 5: | ||
==Apple of Eden== | ==Apple of Eden== | ||
[[File:AC-AltairMalikMap.png|thumb|250px|Altaïr, Malik and two | [[File:AC-AltairMalikMap.png|thumb|250px|Altaïr, Malik, and two Assassins looking at the map]] | ||
This map was | This holographic map in {{Wiki|Mercator projection}} was transmitted by an [[Apple of Eden 2|Apple of Eden]] after the [[Levantine Brotherhood of Assassins|Levantine Assassin]] [[Altaïr Ibn-La'Ahad]] killed his [[Mentor]], [[Al Mualim]].<ref>''[[Assassin's Creed]]'' – [[Assassination (Al Mualim)]]</ref> It was also seen by the [[Templars]] running [[Abstergo Industries]], who had kidnapped [[Desmond Miles]] and put him in the [[Animus]] to view and record Altaïr's [[Genetic memory|genetic memories]].<ref>''Assassin's Creed'' – [[21st century conversations|Modern day]]</ref> | ||
{{-}} | {{-}} | ||
==Altaïr's Codex== | ==Altaïr's Codex== | ||
[[File:ACII Codex Eagle V.png|thumb|left|250px|The Codex map seen in Eagle Vision]] | [[File:ACII Codex Eagle V.png|thumb|left|250px|The Codex map seen in Eagle Vision]] | ||
After seeing the Apple's holographic [[Earth|globe]], Altaïr hid a projection of it in the pages of [[Altaïr Ibn-La'Ahad's Codex|his Codex]] that could only be seen once all thirty pages were arranged in a 6-x-5 grid and were looked at using [[Eagle Vision]]. After the Codex pages were lost at sea in the 14th century,<ref>''[[Assassin's Creed II]]'' – [[Auditore Family Crypt]]: "At Sea"</ref> they were recovered during the [[Renaissance]] by the young [[Italian Brotherhood of Assassins|Italian Assassin]] [[Ezio Auditore da Firenze|Ezio Auditore]], who used the secret map to reveal the location of the [[Vatican Vault]] as well as several others across the world.<ref>''Assassin's Creed II'' – [[X Marks the Spot]]</ref> | After seeing the Apple's holographic [[Earth|globe]], Altaïr hid a projection of it in the pages of [[Altaïr Ibn-La'Ahad's Codex|his Codex]] that could only be seen once all thirty pages were arranged in a 6-x-5 grid and were looked at using [[Eagle Vision]]. After the Codex pages were lost at sea in the 14th century,<ref>''[[Assassin's Creed II]]'' – [[Auditore Family Crypt]]: "At Sea"</ref> they were recovered during the [[Renaissance]] by the young [[Italian Brotherhood of Assassins|Italian Assassin]] [[Ezio Auditore da Firenze|Ezio Auditore]], who used the secret map to reveal the location of the [[Vatican Vault]] as well as several others across the world.<ref>''Assassin's Creed II'' – [[X Marks the Spot]]</ref> | ||
{{-}} | {{-}} | ||
==Abstergo's collection== | ==Abstergo's collection== | ||
[[File:Possible vault locations.jpg|thumb|250px|Abstergo's map marking possible Vault locations]] | [[File:Possible vault locations.jpg|thumb|250px|Abstergo's map marking possible Vault locations]] | ||
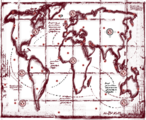
In 2012, Abstergo distributed some maps concerning various Isu locations to Templar agents participating in the [[Multiplayer/ACR|second stage]] of the [[Animi Training Program]]. These included a map drawn by [[Piri Reis]], the Becker-Hagens planetary grid map, and | In 2012, Abstergo distributed some maps concerning various Isu locations to Templar agents participating in the [[Multiplayer/ACR|second stage]] of the [[Animi Training Program]]. These included a map drawn by [[Piri Reis]], the Becker-Hagens planetary grid map, and {{Wiki|cylindrical equal-area projection}} map with possible Isu vaults.<ref>''[[Assassin's Creed: Revelations]]'' – [[Abstergo Files]]: "File.0.16a\FC_Tech"</ref> | ||
{{-}} | {{-}} | ||
==Voynich manuscript== | ==Voynich manuscript== | ||
[[File:ACBM Voynich page.jpg|thumb|left|250px|The map and illustration of the Koh-i-Noor]] | [[File:ACBM Voynich page.jpg|thumb|left|250px|The map and illustration of the Koh-i-Noor]] | ||
The [[Voynich manuscript]], an illustrated codex written in the [[Isu script]], also contained a map detailing information on the location of the [[Koh-i-Noor]] [[diamond]]. In 1839, | The [[Voynich manuscript]], an illustrated codex written in the [[Isu script]], also contained a map detailing information on the location of the [[Koh-i-Noor]] [[diamond]]. In 1839, the [[Indian Brotherhood of Assassins|Indian Assassins]]' Mentor [[Hamid (Amritsar)|Hamid]] tasked [[Arbaaz Mir]] with recovering the map in an attempt to prevent the artifact from falling into the hands of the [[British Rite of the Templar Order|British Templars]].<ref>''[[Assassin's Creed: Brahman]]''</ref> | ||
{{-}} | {{-}} | ||
==Precursor Boxes== | ==Precursor Boxes== | ||
[[Precursor box]]es, also known as Isu Data Caches, occasionally projected maps when powered up. In 422 BCE, the | [[File:ACOD FoA JoA Isu Data Cache.jpg|thumb|250px|A map projected in the Atlantis simulation]] | ||
[[Precursor box]]es, also known as Isu Data Caches, occasionally projected maps when powered up. In 422 BCE, the ''[[Mercenary|misthios]]'' [[Kassandra]] encountered many of these boxes in the [[Aletheia's simulations|simulated]] city of [[Atlantis]] during her trials to master the powers of the [[Staff of Hermes Trismegistus]], although she did not realize the maps' significance.<ref>''[[Assassin's Creed: Odyssey]] – [[The Fate of Atlantis: Judgment of Atlantis]]''</ref> | |||
[[File:ACCI Enemy Revealed (2).jpg|thumb | [[File:Fiat Lux 6.png|thumb|left|250px|Hope Jensen and Shay Cormac observing the map]] | ||
In July 1754, the [[American Brotherhood of Assassins|Colonial Assassins]] [[Hope Jensen]] and [[Shay Cormac]] assisted the inventor [[Benjamin Franklin]] in his experiment to conduct electricity into the box. After three attempts, a holographic projection of the world was emitted, revealing the locations of several [[Seismic Temple]]s, including [[Port-au-Prince Temple|one]] in [[Port-au-Prince]], [[Haiti]] and [[Lisbon Temple|another]] in [[Lisbon]], [[Portugal]]. Unfortunately, the process to view the map was laborious, requiring perfect storm conditions and much scientific equipment, forcing the Assassins to quickly note the Temple locations in case they were unable to open the box again.<ref>''[[Assassin's Creed: Rogue]]'' – [[Fiat Lux]]</ref> By October 1759, however, the Colonial Assassins had found a way to replicate Franklin's experiment,<ref>''Assassin's Creed: Rogue'' – [[The Heist]]</ref> allowing them to power the box and review the location of a [[Arctic Temple|third Temple]] in the [[Arctic Ocean|Arctic]].<ref>''Assassin's Creed: Rogue'' — [[Caress of Steel]]</ref> | |||
[[File:ACCI Enemy Revealed (2).jpg|thumb|250px|William Sleeman activates the map in Tosha Khana]] | |||
In 1841, another Precursor box projected a map in the [[Tosha Khana]] Temple beneath Maharaja [[Ranjit Singh]]'s [[Ranjit Singh's summer palace|summer palace]]. After having stolen the Koh-i-Noor, the [[Master Templar]] [[William Sleeman]] and a force of Templars in the [[British Army]] invaded the palace to access the underground Temple. Once in the Temple, Sleeman used the diamond in conjunction with a box to reveal a map pointing to [[Herat Temple|a temple]] in [[Herat]], [[Afghanistan]]. When Arbaaz confronted Sleeman, the Templar shot at him but missed, disturbing the complex and leading to its destruction.<ref>''[[Assassin's Creed Chronicles: India]]'' – [[The Enemy Revealed]]</ref> | In 1841, another Precursor box projected a map in the [[Tosha Khana]] Temple beneath Maharaja [[Ranjit Singh]]'s [[Ranjit Singh's summer palace|summer palace]]. After having stolen the Koh-i-Noor, the [[Master Templar]] [[William Sleeman]] and a force of Templars in the [[British Army]] invaded the palace to access the underground Temple. Once in the Temple, Sleeman used the diamond in conjunction with a box to reveal a map pointing to [[Herat Temple|a temple]] in [[Herat]], [[Afghanistan]]. When Arbaaz confronted Sleeman, the Templar shot at him but missed, disturbing the complex and leading to its destruction.<ref>''[[Assassin's Creed Chronicles: India]]'' – [[The Enemy Revealed]]</ref> | ||
{{-}} | {{-}} | ||
==Siwa Vault== | ==Siwa Vault== | ||
[[File:ACO Siwa Vault Projection closeup.jpg|thumb|250px|The projection in the Siwa Vault]] | [[File:ACO Siwa Vault Projection closeup.jpg|thumb|left|250px|The projection in the Siwa Vault]] | ||
The [[Siwa Vault]] beneath the [[Temple of Amun| | The [[Siwa Vault]] beneath the [[Temple of Amun|temple]] dedicated to [[Amun (deity)|Amun]] housed a projection of the globe. In 47 BCE, the [[Order of the Ancients]] members [[Flavius Metellus]] and [[Lucius Septimius]] successfully unlocked the vault using [[Alexander the Great]]'s [[Scepter of Alexander the Great|personal]] [[Staves of Eden|Staff of Eden]] and an Apple stolen from [[Apollodorus]]. Once inside, they saw the projection before leaving to [[Cyrene]] and [[Alexandria]], respectively, to continue the Order's [[New World Order|work]].<ref>''[[Assassin's Creed: Origins]]'' – [[The Final Weighing]]</ref> | ||
{{-}} | {{-}} | ||
==Gateway to the Lost City== | ==Gateway to the Lost City== | ||
[[File:AtlanteanHologram.jpg|thumb | [[File:AtlanteanHologram.jpg|thumb|250px|The projection at the Gates of Atlantis]] | ||
Around 422 BCE, this map was activated in [[Gateway to the Lost City|the Gateway]] to Atlantis in [[Thera]] by Kassandra after retrieving four [[Atlantis artifact]]s from [[Olympos Project|creatures]] of mythology. Following the direction of her father [[Pythagoras]], Kassandra placed the artifacts into their corresponding pillars, which then activated a holograph of the world and a narration by the Isu [[Aletheia]].<ref>''Assassin's Creed: Odyssey'' – [[The Gates of Atlantis]]</ref> | Around 422 BCE, this map was activated in [[Gateway to the Lost City|the Gateway]] to Atlantis in [[Thera]] by Kassandra after retrieving four [[Atlantis artifact]]s from [[Olympos Project|creatures]] of mythology. Following the direction of her father [[Pythagoras]], Kassandra placed the artifacts into their corresponding pillars, which then activated a holograph of the world and a narration by the Isu [[Aletheia]].<ref>''Assassin's Creed: Odyssey'' – [[The Gates of Atlantis]]</ref> | ||
{{-}} | {{-}} | ||
==Staff of Hermes Trismegistus== | ==Staff of Hermes Trismegistus== | ||
[[File:ACOD A Message Delivered 9.png|thumb|250px|Projection by the Staff of Hermes Trismegistus]] | [[File:ACOD A Message Delivered 9.png|thumb|left|250px|Projection by the Staff of Hermes Trismegistus]] | ||
In 420 BCE, while in the [[Tomb of Phaiax]] on [[Korfu]], Aletheia triggered the Staff of Hermes Trismegistus in Kassandra's possession to display a map of the globe, depicting vaults around the world holding at least one Isu artifact within. Aletheia then gave Kassandra the mission to find said vaults and prevent the artifacts from falling into the wrong hands, a task which would take a lifetime to complete.<ref name="A Message Delivered">''Assassin's Creed: Odyssey – [[Assassin's Creed Crossover Stories]]'' – [[A Message Delivered]]</ref> | In 420 BCE, while in the [[Tomb of Phaiax]] on [[Korfu]], Aletheia triggered the Staff of Hermes Trismegistus in Kassandra's possession to display a map of the globe, depicting vaults around the world holding at least one Isu artifact within. Aletheia then gave Kassandra the mission to find said vaults and prevent the artifacts from falling into the wrong hands, a task which would take a lifetime to complete.<ref name="A Message Delivered">''Assassin's Creed: Odyssey – [[Assassin's Creed Crossover Stories]]'' – [[A Message Delivered]]</ref> | ||
{{-}} | {{-}} | ||
==Gallery== | |||
<gallery captionalign="center" position="center" widths="180"> | |||
ACO First Civilization Map.png|Siwa Vault map projection | |||
AC1 Map Projection.png|Render of the Apple of Eden's projected map | |||
AC2 Codex Map Outline.png|Codex map outline | |||
AC2 Codex Map Eagle Vision.png|Codex map outline seen in Eagle Vision | |||
</gallery> | |||
==Appearances== | ==Appearances== | ||
Revision as of 23:50, 17 February 2025

|
I wanted to ask you something. Which is... what's your name? This article title is conjecture. Although the article subject is canon, no official name for it has been given. |

|
Patience, brothers. Soon we will reveal the secrets of Assassin's Creed: Valhalla (Tombs of the Fallen). This article has been identified as being out of date. Please update the article to reflect recent releases and then remove this template once done. |
An Isu map is a map projected by or derived from Precursor relics or knowledge. Many pinpoint the locations of Isu temples and the artifacts they house.
Apple of Eden

This holographic map in Mercator projection was transmitted by an Apple of Eden after the Levantine Assassin Altaïr Ibn-La'Ahad killed his Mentor, Al Mualim.[1] It was also seen by the Templars running Abstergo Industries, who had kidnapped Desmond Miles and put him in the Animus to view and record Altaïr's genetic memories.[2]
Altaïr's Codex

After seeing the Apple's holographic globe, Altaïr hid a projection of it in the pages of his Codex that could only be seen once all thirty pages were arranged in a 6-x-5 grid and were looked at using Eagle Vision. After the Codex pages were lost at sea in the 14th century,[3] they were recovered during the Renaissance by the young Italian Assassin Ezio Auditore, who used the secret map to reveal the location of the Vatican Vault as well as several others across the world.[4]
Abstergo's collection

In 2012, Abstergo distributed some maps concerning various Isu locations to Templar agents participating in the second stage of the Animi Training Program. These included a map drawn by Piri Reis, the Becker-Hagens planetary grid map, and cylindrical equal-area projection map with possible Isu vaults.[5]
Voynich manuscript

The Voynich manuscript, an illustrated codex written in the Isu script, also contained a map detailing information on the location of the Koh-i-Noor diamond. In 1839, the Indian Assassins' Mentor Hamid tasked Arbaaz Mir with recovering the map in an attempt to prevent the artifact from falling into the hands of the British Templars.[6]
Precursor Boxes

Precursor boxes, also known as Isu Data Caches, occasionally projected maps when powered up. In 422 BCE, the misthios Kassandra encountered many of these boxes in the simulated city of Atlantis during her trials to master the powers of the Staff of Hermes Trismegistus, although she did not realize the maps' significance.[7]

In July 1754, the Colonial Assassins Hope Jensen and Shay Cormac assisted the inventor Benjamin Franklin in his experiment to conduct electricity into the box. After three attempts, a holographic projection of the world was emitted, revealing the locations of several Seismic Temples, including one in Port-au-Prince, Haiti and another in Lisbon, Portugal. Unfortunately, the process to view the map was laborious, requiring perfect storm conditions and much scientific equipment, forcing the Assassins to quickly note the Temple locations in case they were unable to open the box again.[8] By October 1759, however, the Colonial Assassins had found a way to replicate Franklin's experiment,[9] allowing them to power the box and review the location of a third Temple in the Arctic.[10]
.jpg)
In 1841, another Precursor box projected a map in the Tosha Khana Temple beneath Maharaja Ranjit Singh's summer palace. After having stolen the Koh-i-Noor, the Master Templar William Sleeman and a force of Templars in the British Army invaded the palace to access the underground Temple. Once in the Temple, Sleeman used the diamond in conjunction with a box to reveal a map pointing to a temple in Herat, Afghanistan. When Arbaaz confronted Sleeman, the Templar shot at him but missed, disturbing the complex and leading to its destruction.[11]
Siwa Vault

The Siwa Vault beneath the temple dedicated to Amun housed a projection of the globe. In 47 BCE, the Order of the Ancients members Flavius Metellus and Lucius Septimius successfully unlocked the vault using Alexander the Great's personal Staff of Eden and an Apple stolen from Apollodorus. Once inside, they saw the projection before leaving to Cyrene and Alexandria, respectively, to continue the Order's work.[12]
Gateway to the Lost City

Around 422 BCE, this map was activated in the Gateway to Atlantis in Thera by Kassandra after retrieving four Atlantis artifacts from creatures of mythology. Following the direction of her father Pythagoras, Kassandra placed the artifacts into their corresponding pillars, which then activated a holograph of the world and a narration by the Isu Aletheia.[13]
Staff of Hermes Trismegistus

In 420 BCE, while in the Tomb of Phaiax on Korfu, Aletheia triggered the Staff of Hermes Trismegistus in Kassandra's possession to display a map of the globe, depicting vaults around the world holding at least one Isu artifact within. Aletheia then gave Kassandra the mission to find said vaults and prevent the artifacts from falling into the wrong hands, a task which would take a lifetime to complete.[14]
Gallery
-
 Siwa Vault map projection
 -
 Render of the Apple of Eden's projected map
 -
 Codex map outline
 -
 Codex map outline seen in Eagle Vision


Appearances
- Assassin's Creed (first appearance)
- Assassin's Creed II
- Assassin's Creed: Revelations
- Assassin's Creed: Brahman
- Assassin's Creed: Rogue
- Assassin's Creed Chronicles: India
- Assassin's Creed: Origins
- Assassin's Creed: Odyssey
- Assassin's Creed: Valhalla
References
- ↑ Assassin's Creed – Assassination (Al Mualim)
- ↑ Assassin's Creed – Modern day
- ↑ Assassin's Creed II – Auditore Family Crypt: "At Sea"
- ↑ Assassin's Creed II – X Marks the Spot
- ↑ Assassin's Creed: Revelations – Abstergo Files: "File.0.16a\FC_Tech"
- ↑ Assassin's Creed: Brahman
- ↑ Assassin's Creed: Odyssey – The Fate of Atlantis: Judgment of Atlantis
- ↑ Assassin's Creed: Rogue – Fiat Lux
- ↑ Assassin's Creed: Rogue – The Heist
- ↑ Assassin's Creed: Rogue — Caress of Steel
- ↑ Assassin's Creed Chronicles: India – The Enemy Revealed
- ↑ Assassin's Creed: Origins – The Final Weighing
- ↑ Assassin's Creed: Odyssey – The Gates of Atlantis
- ↑ Assassin's Creed: Odyssey – Assassin's Creed Crossover Stories – A Message Delivered